Fennel & Pistachio Cookies

Fennel & Pistachio Cookies

During the holiday season, I always plan a baking project that will double as a simple gift option. Homemade cookies are sure to brighten anyone's day and these Fennel & Pistachio Cookies are a superb nontraditional option. The ingredients in these cookies might cost a bit more than your standard chocolate chip, but I'm sure you will agree that the extra few dollars is absolutely worth it when you taste them.

I'm often wary of desserts that call for citrus, but the lemon zest in this recipe is a perfect complement to the pistachio, fennel and almond flavors. I've included instructions for a very simple packaging option in this post. 

Fennel & Pistachio Cookies

Fennel & Pistachio Cookies

Adapted from the Wisconsin Milk Marketing Board

(The only change I made to this recipe was to increase the fennel seeds slightly.)

Ingredients:

1 cup (2 sticks) butter, softened
1 1/2 cups sugar
1 egg
2 tablespoons almond extract (or amaretto)
1 tablespoons lemon zest
2 teaspoons fennel seeds
2 cups all-purpose flour
1 teaspoon baking powder
1/2 teaspoon salt
3/4 cup pistachio nuts, chopped, plus extra for garnish

Method:

Preheat oven to 350°F. Beat butter until creamy. Add sugar and mix well. Add egg and beat well. Add almond extract, lemon zest, and fennel seeds and mix to combine.

In a medium bowl, combine the flour, baking powder and salt. Gradually add to the butter mixture and beat well. Stir in pistachio nuts (dough will be stiff).

Shape dough into one inch balls and place two inches apart on baking sheets lined with a silcone mat or parchment. Flatten balls slightly and add additional pistachios. Bake for 10 minutes or until lightly browned around the edges. Cool slightly on baking sheets and then transfer to wire racks to cool completely. Store in an airtight container at room temperature for up to one week.

Gift Bag Supplies

Packaging

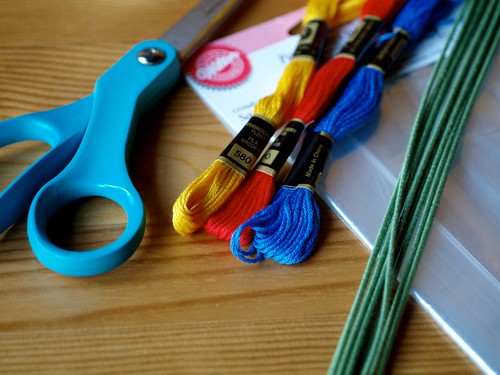
To package the cookies you will need scissors, cellophane bags, embroidery thread in the color of your choice and green cloth-wrapped floral wire. You should be able to find all of these items are your local craft store. 

Flower Assembly

I chose to use a pale yellow embroidery thread that was reminiscent of fennel blossoms. Simply hook the floral wire over at one end and wrap the thread around two fingers several times. Snip from the rest of the thread and place the bundle under the hooked wire. Wrap the hooked wire around the bundle tightly to secure it and ensure that the thread sticks up rather than out. Then, cut open the thread loops and trim the floral wire stem to your desired length.

Gift Wrapped Cookies

Place your cookies in the cellophane bags and close with fennel blossom flowers. Keep your cookies in an airtight container until you are ready to give them away to ensure the best flavor. The recipe makes three dozen cookies and I was able to bake and package six gifts of half a dozen cookies in just over one hour. 

*Full disclosure: I was asked to participate in this holiday baking event by the Wisconsin Milk Marketing Board. I selected and modified this recipe, and created my own packaging. I received compensation for my participation. 

Escargot-Style Roasted Mushrooms Recipe

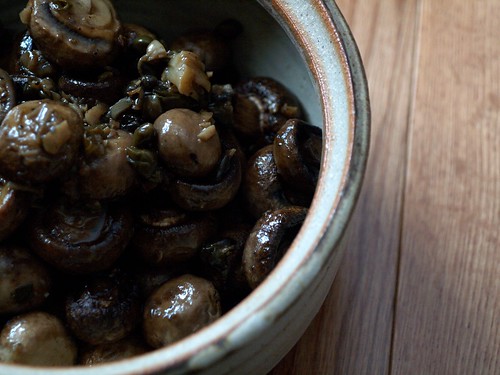
Roasted Mushrooms Escargot-Style

The autumn leaves that brightly line our streets are quickly falling and the time change marks the point in the year that I begin to plot out my days around maximizing daylight.  However, this mid-November has also greeted us with unseasonably warm temperatures, causing a brief interlude of bare legs and patio dining. 

Tiffany Glass Dome at the Chicago Cultural Center

I spent last weekend in Chicago - one of the first in quite a while - and enjoyed a Publican brunch with my family followed by a visit to the Chicago Cultural Center. The afternoon ushered in my first thoughts of the holidays and I've been thinking about my Thanksgiving menu contributions since. This simple side dish makes a great vegetarian addition to the holiday table.  Serve the mushrooms on their own or with some crusty bread to soak up the flavorful, buttery sauce. 

Evan at the Chicago Cultural Center

Roasted Mushrooms Escargot-Style

Adapted from Gourmet January 2009

Ingredients

1 lb mushrooms such as cremini or white, halved lengthwise if large
2 Tbl capers, rinsed and chopped
3 large garlic cloves, minced
2 Tbl vegetable oil
3 Tbl unsalted butter, cut into pieces
2 tsp fresh lemon juice
1/4 cup chopped flat-leaf parsley
salt and pepper

Method

Preheat oven to 450F. Toss the mushrooms with the capers, garlic, oil, and salt and pepper in a two-quart shallow baking dish. Top with butter and roast the mushrooms for 15 to 20 minutes, or until golden and tender, stirring occasionally. Toss with the lemon juice and parsley, and serve.

Halloween Candy Recipe

Candy (1 of 6)

Looking for a fun Halloween project? Forgo the artificial flavors and wax coating of store-bought candy corn and candy pumpkins by making your own. This recipe from Gapers Block produces great results.

Halloween is one of my favorite holidays. One of the perks of living in a university town is that it isn't hard to find costume parties. It seems like it's been years since I've been around people interested in dressing up.  I'm looking forward to celebrating tonight and tomorrow in my homemade Rosie the Riveter costume.

Candy (3 of 6) Candy (5 of 6) 

Candy making is not my strong point in the kitchen, but I followed Shanna's recipe exactly and it worked out very well. I wound up with quite a bit of extra green dough after dividing it in the quantities the recipe calls for. This gave me the opportunity to make some green pumpkins and candy snakes. Though, if you want all of your candy to look more traditional, I'd recommend making slightly less green dough.

Have a great Halloween!

(Post topic from the archives.)

Panzanella Recipe

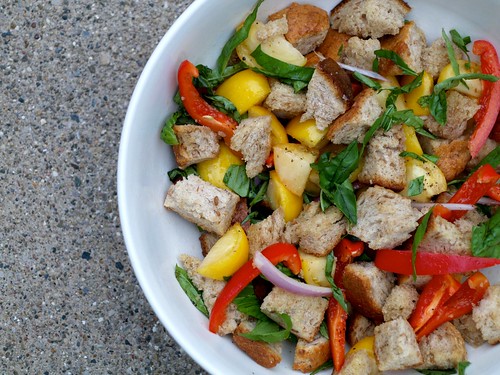
Panzanella

The farmers at my local market are selling the last of their tomatoes, our basil plant is spending the night indoors for fear of frost, and the days are getting rapidly shorter. I realize that fall is already in full swing, but I hope you will humor me as I sneak in one last summer recipe. I've made this simple panzanella a few times over the last two months and it continues to provide a lovely balance between fresh and comforting, even as the temperature begins to drop. 

Osage Apples

I celebrated my 29th birthday recently with a weekend visit from my parents and Nick. We enjoyed good food and drinks and spent ample time outside -- my favorite things. We made a trip out to Allerton Park to picnic, hike, and explore the estate -- and we were mesmerized by the giant Osage Apples.

Allerton Greenhouse

Once the weekend plans were over, the visitors left, and I settled back into writing papers -- I felt a bit lonely when my actual birthday came and went without much fanfare. I've always been the type to throw a birthday party, and it felt odd to let a year go by without doing so.

Though, sometimes it is nice to be alone - to stop and be grateful for long walks, new thrift store scarves, and the opportunity to be back in school - even if I don't currently have the kind of life that is conducive to Tuesday-night-birthday-dinner-parties.

My 29th Birthday

Panzanella
Adapted from Saveur

Ingredients:

1/4 C plus 2 Tbl olive oil
2 Tbl butter
3 cloves garlic, sliced
3 C of good quality, crusty, slightly stale bread cut into 1/2 inch cubes
3 C of cherry tomatoes, sliced in half
1/2 a medium shallot, thinly sliced
1/2 a medium red bell pepper, thinly sliced
2 Tbl balsamic vinegar
Salt and pepper
1 handful of fresh basil, thinly sliced


Method:

Preheat oven to 350F. Heat 1/4 cup of olive oil and the butter in a large ovenproof skillet. When the butter has melted, turn off the heat, add the garlic and bread cubes, and mix well. Place the skillet in the oven and bake for 10 to 15 minutes, stirring occasionally. When the bread is golden brown and toasted, and the garlic is fragrant, remove from the oven and set aside to cool.  

In a medium bowl, mix together the tomatoes, the remaining two tablespoons of olive oil, and the vinegar. Add salt and freshly ground black pepper to taste. 

In a large bowl, combine the bread, tomatoes and basil. Serve immediately. 

Sautéed Summer Greens

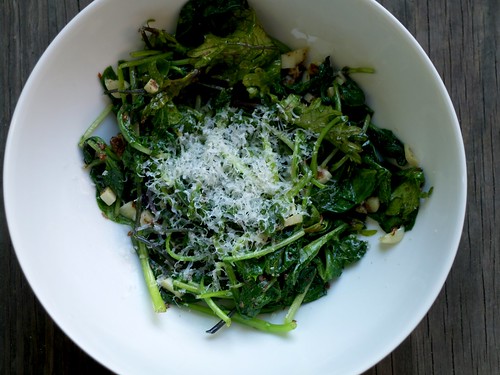
Sauteed Greens

This is the first summer that I've lived in an apartment conducive to CSA deliveries. I was lucky to find an organic local foods delivery service that does not require a subscription, but instead will allow me to place an order any week I choose. I've had fun finding ways to use these fresh ingredients, especially those that are new to me like hon tsai tai and potato onions.

High quality produce is flavorful enough to stand on its own with little embellishment. My favorite summer dishes are often those that are quick and barely need a recipe.  Here is one that I have been making frequently with any greens I have on hand. 

Sautéed Summer Greens

Ingredients

1.5 Tbl olive oil

1 Tbl ground flax seeds

4 garlic cloves, chopped

8 ounces greens*

salt and pepper to taste

fresh lemon juice

Grated Parmigiano-Reggiano to finish

(*I used a mix of arugula, chard, mustard, tat soi, bok choi, and mizuna from Harmony Valley Farm in Viroqua, Wisconsin. This gorgeous mix of greens was part of my most recent CSA delivery from Irv & Shelly's Fresh Picks.) 

Method

Rinse greens under cold water and spin dry. Heat oil in a large skillet over medium heat. Add ground flax seeds and garlic and saute for one or two minutes.  Add greens, season with salt and pepper, and saute until just wilted. Remove from heat. Squeeze lemon juice over the greens to taste and transfer to a serving dish. Finish with freshly grated Parmigiano-Reggiano cheese. 

Serves two to three as a side or one for a meal. 

Zucchini Pasta with Parsley Almond Pesto

zucchini 4

Until quite recently, I would pass over recipes that usedsquash as a stand-in for pastas. I assumed these dishes were for the low-carb dieters of the world, not for a cook with my appetite. I’m not sure what compelled me to finally give zucchini pasta a try last month, but I’m glad I finally came around.

Some recipes call for a mandoline, or a sharp knife and a steady hand, to thinly slice the zucchini. I’ve found that using a vegetable peeler to shave off thin ribbons provides consistently great results. The recipe below makes a hearty serving for one with leftover pesto. Increase the zucchini as necessary. Zucchini is also a great addition to regular pasta dishes. I like to add it to the lemon pepper pappardelle from Trader Joe’s. Just add the zucchini to the pasta water for the last minute or two of cooking and drain everything together before serving.

zucchini 3

Zucchini “Pasta” with Parsley Almond Pesto

Ingredients

2 medium zucchini
2 Tbl whole almonds
1 C packed Italian parsley leaves
4 Tbl olive oil
1 tsp fresh lemon juice
1/4 tsp salt
1 small garlic clove, pressed
Grated Parmigiano Reggiano for serving

Method

To make the pesto, I follow this recipe from Molly and Orangette.

To prepare the zucchini, bring a medium pot of salted water to a boil. Meanwhile, shave off thin slices of zucchini using a vegetable peeler. When you reach the seeds in the middle of the squash, you may prefer to stop peeling and reserve the zucchini heart for a salad. I usually continue to peel and add the entire zucchini, but the texture will be slightly different, so this is a matter of preference.

Add the zucchini to the boiling water for just a minute or two. When the green of the zucchini brightens, test a piece. The zucchini should be just tender. Do not over cook. Drain and transfer to a serving dish. Toss with a tablespoon or two of the pesto and finish off with freshly grated Parmigiano Reggiano.

Rosemary, Black Pepper & Brown Butter Soda Bread

Logan 10

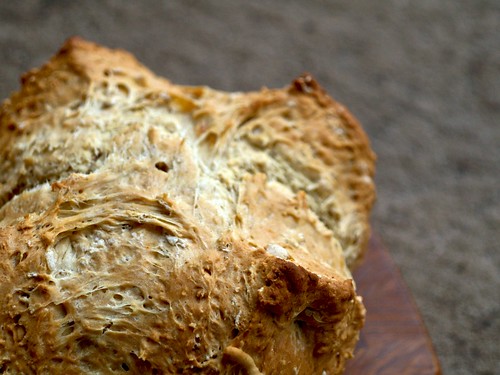
I waded through rainy streets and crowds of St. Patrick's Day revelers yesterday on my way to meet my friend Joanna. Our conversation focused on food, as it often does, and she mentioned this brown butter soda bread recipe as one of her favorites. In the weeks leading up to this holiday each year, I encounter half a dozen different Irish soda bread recipes earnestly claiming to be the most authentic.  I liked the idea of adding rosemary, fresh black pepper and browned butter to this quick bread base to create a decidedly non-traditional version. 

The end result of the recipe was wonderful. A few notes: I found that my dough was quite wet after following the instructions, so I ended up adding about half a cup more flour than the original recipe calls for. Be sure to have a some extra flour on hand so that you can get the texture just right. You want a moist dough that just comes together in your hands.  I didn't knead this bread at all. I simply mixed the dough in the bowl until it formed a smooth ball and then formed the loaves. Lastly, I decided not to spend the money on fresh rosemary and instead used about half a teaspoon of powdered Spanish rosemary leaves.  Definitely use fresh if you prefer.  

Brown Butter and Black Pepper Irixsh Soda Bread

Rosemary, Black Pepper & Brown Butter Soda Bread

Adapted from Bon Appetit

Ingredients

1/4 C butter
3 1/2 C flour, plus 1/2 C
1/2 C old-fashioned oats
1 Tbl sugar
1/2 tsp powdered rosemary (or 1 Tbl fresh, chopped)
2 tsp baking powder
1 tsp baking soda
1 tsp salt
3/4 tsp black pepper, freshly ground
1 3/4 C buttermilk

Method

Place a baking stone in your oven and preheat oven to 375F.  (Don't worry if you don't have a baking stone, you can simply use an ungreased baking sheet. Don't place it in the oven as it heats. If you'd like a baking stone, check out this great post on making your own for $3.)

Melt butter in skillet over medium heat and cook until golden brown and fragrant, about 3 minutes. Set aside.

In a large bowl, combine all the ingredients except the buttermilk and butter.  Mix well and add the buttermilk and butter.  Mix until the dough comes together in a smooth ball. Add more flour if you need it (I did). Form dough into two rounds with your hands and transfer to the baking stone or baking sheet. Using a sharp knife, cut an "X" in the top of each loaf - about 1/2 an inch deep.

Bake until breads are a deep golden brown and a toothpick comes out clean when inserted in the center -- about 45 minutes.  Allow to cool for a least 30 minutes before slicing. Serve with plenty of high quality butter.

Mushroom Barley Risotto

February 10, 2010

I was born and bred in this region, but each Chicago winter feels longer than the last to me. I don't really mind the cold, but I do mind the short days and difficult terrain.  Like most people in my family, I derive a lot of joy in spending time outside and the city feels somewhat limited to me during this season.  The holidays have passed, work is busy, and I find most of my outdoor time is spent simply in transit rather than idle enjoyment. My one, simple resolution this year was to go outside and walk every day at lunch -- whether it was particularly inhospitable out or I felt I had too much work to complete.  I'm happy to say I've stuck to it on all but one very bad, very busy day. 

Winter Sun

I've begun to notice some indications that spring is on its way. The days are getting longer, hats are not required at all times, and I was recently on a bus with its ceiling air-vent propped open (though, the heat was blasting). I also have a trip to look forward to. I'm excited that all of the pieces have fallen into place for a spring vacation to San Francisco.  I've hardly left town since last summer and I'm in need of a bit of warmth. I'll be visiting some dear friends and running the Oakland Half Marathon. I was 12 the last time I visited the area, so please feel free to share some travel tips!

Barley Risotto

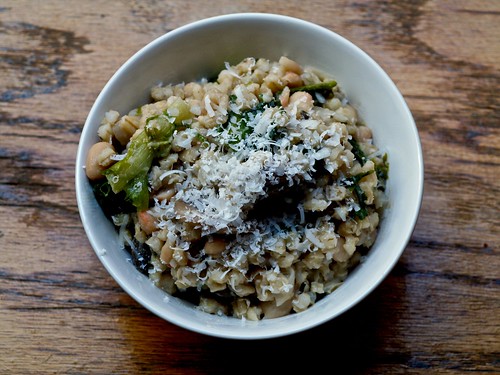
Here is a hearty dish for these last few weeks of cold.  This Mushroom Barley Risotto is simple, healthy and inexpensive.  The escarole adds a nice touch -- one that I wouldn't have thought to add on my own.

Mushroom Barley Risotto

Inspired by Smitten Kitchen and Food & Wine

Ingredients

6 oz white mushrooms, sliced
6 C low-sodium vegetable stock
2 Tbl olive oil
1 medium white onion, diced
1/4 tsp dried  thyme
1 C pearled barley
1 15 oz can of cannelloni beans
4 C escarole, chopped 
1/2 C Parmigiano-Reggiano cheese, freshly grated
2 Tbl butter
Salt and pepper to taste

Method

In a dry pan, saute the mushrooms until dark, fragrant and moist.  Set aside. In a medium saucepan, heat the stock and keep warm.

In a large, deep skillet, heat the oil over medium heat. Add the onion and thyme and cook until the onion is soft, about six minutes. Add the barley and cook, stirring for two minutes. Add the mushrooms and one cup of the stock. Stir until absorbed.  Continue with all but 1/2 a cup of the stock, adding it a 1/2 cup at a time.  This should take about 35 minutes.

Add the beans and cook for one minute. Add the last 1/2 cup of stock if necessary or desired. Add the escarole and stir until wilted and cook for one additional minute.   Add the cheese and butter and season with salt and pepper to taste.  Serve with extra grated Parmigiano-Reggiano for garnish.

Braised Green Cabbage

Braised Cabbage

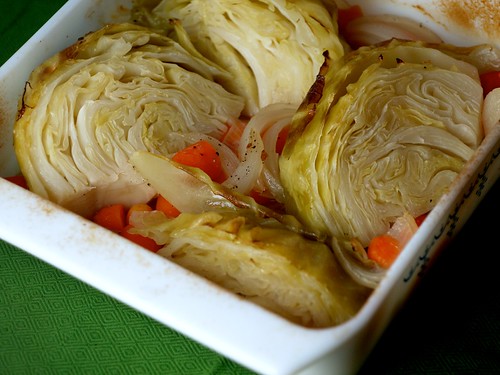
Snowstorms and late nights at the office have me searching for winter comforts like herbal tea, down-filled blankets and warm, satisfying food. This is the season for braising and one of my favorite dishes comes from Molly at Orangette (adapted from Molly Stevens). Not only is this recipe inexpensive and simple to prepare, but it elevates the lowly cabbage to something silky and elegant.  I'd highly recommend it if you too are in need of a winter warm-up. 

Lights

I was thrilled to learn recently that I had won a Lowel Ego light set through the Menu for Hope raffle! I took the first photo in this post at 9:30 pm on a dark, blustery Chicago evening. These lights make a huge difference for evening food photography and I can't wait to experiment with them more. Thanks to Kalyn of Kalyn's Kitchen for contributing such a generous raffle prize and to Pim of Chez Pim for hosting the sixth annual Menu for Hope.  This year, the event raised nearly $79,000 for the UN World Food Program!

Chipotle & Cumin Black Bean Soup

Soup and Bread 3

Earlier this week, I joined a handful of other Chicago cooks at the Hideout for the weekly winter Soup & Bread event. It was a full house and we helped to raise $400 for the Franciscan Outreach Mission through donations. Thank you to everyone who came out!

Soup and Bread 1

It was a delicious night. Check out the Soup & Bread cookbook and if you live in Chicago, be sure to stop by one of the upcoming Wednesday night events. A big thank you to Martha Bayne and the Hideout for continuing to organize events that benefit local and international organizations.

Chipotle & Cumin Black Bean Soup

Inspired by Bon Appetit

Ingredients

16 oz dried black beans, rinsed and picked over
Water
1 Tbl olive oil
2 red onions, chopped
1 red bell pepper, chopped
1 yellow bell pepper, chopped
1 green bell pepper, chopped
6 garlic cloves, minced
4 tsp ground cumin
2 canned chipotle chiles in adobo sauce, chopped*
Salt and black pepper
2 Tbl fresh lime juice
1/2 C sour cream (optional)
Cilantro (optional)

Method

In a large pot, bring the dried beans and 7 cups of water to a boil. Reduce heat and simmer for about 2 to 2 1/2 hours, adding more water if necessary. Cook until the beans are tender. Salt to taste (salting earlier will cause the skins to toughen).**

In a second large pot, heat the oil over medium-high heat and add the onion and bell peppers. Cook until tender and beginning to brown, about 8 minutes. Add the garlic, cumin and chiles and cook for 1 minute. Add the prepared beans. Cover and allow to simmer for about 20 minutes. Season to taste with salt and freshly ground black pepper. Stir in the lime juice. Serve with sour cream and cilantro to garnish.

*This soup is spicy.  Reduce the chiles for a milder soup.

**Beans can be prepared a day or two ahead.  Allow to cool at room temperature and store in an airtight container in the refrigerator. If you prefer to use canned beans, substitute 7 to 8 cups. Do not drain.

Soup & Bread

Soup

For the second time in a matter of weeks, I'll be teaming up with the Hideout and some great Chicago cooks to raise money for those in need. 

Soup & Bread
at the Hideout
1354 W. Wabansia
Wednesday, February 3
5:30 to 8
Free

Yes,free soup and bread!  Though, each week a local food pantry benefits from the donations that diners are able to contribute.  The cooks donate the ingredients and labor. I'm making a chipotle & cumin black bean soup. (Not pictured -this is a poached egg soup). 

Others will be contributing:
lamb chili with red wine and black beans
smoky red lentil soup
chicken and winter vegetable soup
squash and pear soup
potato, butternut and leek soup

Chicagoans, join us! Take shelter from the cold and find comfort in a warm bowl of homemade soup. If you don't live nearby, be sure to check out the lovely Soup & Bread cookbook.

Maple Pecan Bars

Maple Pecan Bars

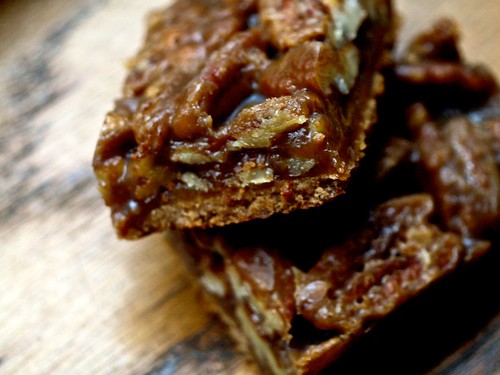
When I agreed to join other Chicago cooks and bakers tonight for the Hideout Haiti Benefit & Bake Sale, I knew I needed a recipe that I could make the night before and that would be easy to individually wrap for sale in compact, but rich quantities. While I'm not a big pecan pie fan - (dry pecans, corn syrup) - these maple pecan bars appealed to me with their thick caramel filling, cookie crust and maple syrup. The bars are soft when warm and crisp and brittle when cool. I made two batches last night, yielding two dozen squares. I hope you will come out to the Hideout to join us tonight and sample some of the wonderful contributions. All proceeds will be donated to Partners in Health, an organization that has been working on the ground in Haiti for over 20 years.

Update: The Hideout Benefit raised nearly $8,000! The bake sale contributed $752 of this total.  Thank you everyone!

Maple Pecan Bars

Adapted from Williams-Sonoma Essentials of Baking

Ingredients

For the crust:

1 1/4 C unbleached, all-purpose flour
1/3 C light brown sugar, packed
1/4 tsp salt
8 Tbl butter, at room temperature

For the filling:

6 Tbl butter
1/3 C pure maple syrup
2/3 C light brown sugar, packed
1/3 C heavy cream
2 C pecan halves

Method

Preheat oven to 350F.  Carefully line an 8x8x2 inch glass baking dish with heavy-duty aluminum foil, allowing the foil to extend over the sides of the dish.  Lightly butter the foil.

In a medium bowl, combine all the ingredients for crust.  You will have a dry dough that sticks together when you press it between your fingers.  Press the crust mixture into the prepared baking dish in an even layer. Bake the crust, rotating half way through, until the edges are lightly browned and the top feels firm when gently touched. About 15 minutes.

After the crust is finished baking, begin preparing the filling by combining the butter, maple syrup and brown sugar in a saucepan over medium-high heat. Stir until all the ingredients dissolve. Bring to a boil and boil for one minute.* Remove from the heat and quickly stir in the cream.  Then stir in the pecans. Pour the hot filling over the partially baked crust and spread evenly with a spatula.

Bake until filling is somewhat set when you shake the pan and small bubbles appear over the whole dish. About 25 minutes. Transfer dish to a wire rack and allow to cool for 30 minutes.  Transfer dish to the refrigerator and allow to cool for an hour.

Gently lift the foil liner to remove from the baking dish. Gently peel away the foil and cut into pieces using a sharp knife.  Store in an airtight container for up to three days.

(*A few words of advice for bakers who get nervous about cooking sugars on the stove top.  This is a pretty simple recipe to ease into the process. The butter, brown sugar and maple syrup mixture will begin to simmer along the sides, but wait until you are seeing more vigorous bubbles in the middle of the mixture before you start timing the minute that the recipe calls for the boil.)

Hideout Haiti Benefit & Bake Sale

Cake

Chicago readers, please join me this Monday night (January 18th) for the Hideout Haiti Benefit featuring music from the Waco Brothers and Eleventh Dream Day, a poster sale by Judgeworks, and a bake sale organized by Joanna of My Vegetable Blog and The Kitchn with volunteer contributors: Janine of Rustic Kitchen, Andrea of Forkable, Kathy of Stresscake, Daniel of Fruit Slinger and Waffleizer, and me -- Gemma of Pro Bono Baker.

The benefit event is $20 and all door and sale proceeds will be donated to Partners in Health. Tickets can be purchased in advance or at the door. Show starts at 8 pm.

We need more bakers!  If you live in Chicago and would like to contribute about two dozen baked goods (or another homemade product) to the effort, please contact joannam(at)apartmenttherapy(dot)com.  Joanna has also generously agreed to pick up contributions on Sunday night for interested bakers that cannot make the benefit event. Please contact her as soon as possible to coordinate.

If you can't make it to the event and would still like to contribute to Partners in Health, you can do so below. Partners in Health has been working on the ground in Haiti for over 20 years and, along with other organizations, is in desperate need of support to meet the needs of those affected by the crisis in Haiti.

Stand With Haiti

Lemon & Olive Oil Cake

Cake2

Five years ago I started this website with an earnest love of sharing good food with dear friends. It is a happy coincidence that Pro Bono Baker's anniversary shares calendar space with the birthday of one of my oldest and most treasured friends, Eileen. I joined her this weekend for a birthday brunch in her lovely, sun-soaked apartment and I brought this rustic lemon and olive oil cake.

Calling for equal parts olive oil and sugar, this cake has a gentle sweetness and a delicate flavor. To add some visual flair for the special occasion, I cooked dark cherries with sugar and lemon juice to create a thick glaze that I added just before serving.

Thank you all for a truly enjoyable five years!  I look forward to cooking with you and learning from you for years to come.

Cake3 

Lemon & Olive Oil Cake

Adapted from the April 2006 issue of Gourmet

Ingredients

3/4 C extra-virgin olive oil
1 large lemon
1 C cake flour (not self-rising)
5 large eggs, separated, reserving 1 white for another use
3/4 C plus 1 1/2 Tbl sugar
1/2 tsp salt

Method

Preheat oven to 350F. Prepare a 9-inch springform pan with olive oil. Cut a circle of parchment paper, fit it into the bottom of the pan and oil the parchment.

In a medium bowl, finely grate the lemon zest and combine with the flour. In a second bowl, beat the egg yolks with 1/2 cup of sugar using an electric hand mixer until thick and pale, about three minutes.  Add the olive oil and 1 1/2 tablespoons of lemon juice and beat until just combined. (The mixture may appear slightly separated.  This is okay.) Gently stir in the flour mixture with a wooden spoon. 

In a third bowl, beat the egg whites with 1/2 teaspoon of salt using clean beaters until foamy. Add 1/4 cup of sugar a little at time and continue to beat the egg whites until they begin to form soft peaks, about three minutes.  Gently fold 1/3 of the whites into the yolk mixture.  Add the remaining whites gently and combine thoroughly.  Transfer the mixture to the prepared springform pan and gently rap the pan on your work surface a few times to release any large air bubbles.  Sprinkle the top evenly with the remaining 1 1/2 tablespoons of sugar.

Bake until puffed and golden or until a wooden toothpick inserted into the center comes out clean, about 35 minutes. Cool the cake for 10 minutes before removing from the springform pan. After time has elapsed, run a thin knife around the edge of the pan and remove the side. Cool the cake to room temperature, about an hour. Remove the bottom of the pan, peel off parchment and transfer cake to a serving plate.