Halloween Severed Finger Cookies

One of my favorite things about graduate school is how seriously most of the people I know take Halloween, and costume parties in general. Gone are the days of purely revealing or unimaginative attire - instead, many people expend considerable effort to pull off witty homemade costumes. A welcome symptom of student procrastination.
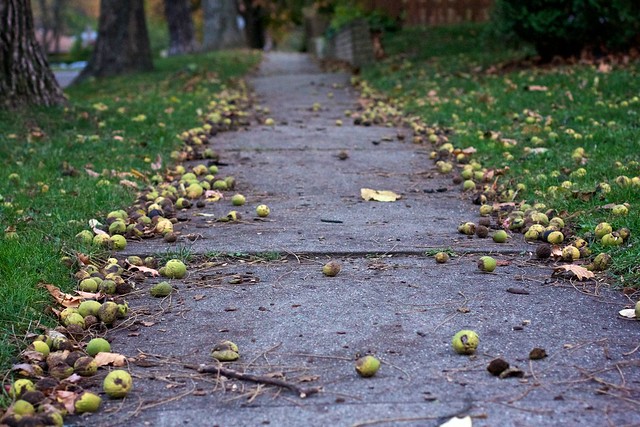
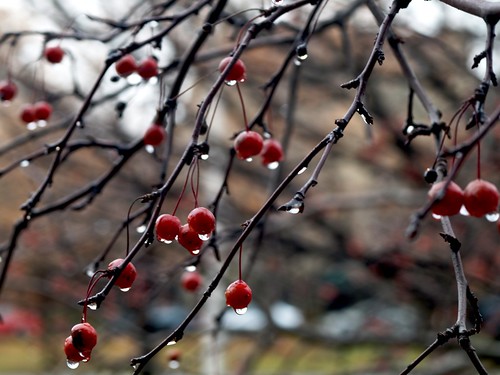
Late October

Some of my favorites this year included Firefox (the web browser), a nine-foot tall raven, a dust bunny, and an entire village of Spartans. I dressed as Daria and Nick went as Harpo. I'm looking forward to tomorrow and hoping that the grown-up-looking house I share with my roommates means we will have some trick-or-treaters.

Julia's

I hope everyone has had a great Halloween weekend. If you haven't had your fill of sugar yet, give these ghoulish cookies a try. There are many variations of this recipe available online. I read through a half dozen and distilled my own. A couple versions suggested using red jam to secure the almonds. I didn't have any jam on hand, but I think this would be a great addition.

Late October

Severed Finger Cookies Makes about 4 dozen

Ingredients

1 C butter, softened
3/4 C sugar
2 3/4 C flour
1 tsp baking powder
1 tsp salt 1 egg, lightly beaten
1 tsp vanilla extract
1 tsp almond extract
50 whole almonds (I used raw)

Method

In a large bowl, cream the butter and sugar. Mix in the flour, baking soda, and salt. Add the egg and extracts, and mix until thoroughly combined. (I found it was easiest to use my hands to mix.) Form the dough into a ball and cover in plastic. Chill the dough in the refrigerator for 30 minutes.

Preheat oven to 400F and line a large baking sheet with parchment paper.

Using about a tablespoon of dough, roll the dough into finger length pieces and place them on the prepared baking sheet. Use a sharp paring knife to cut three creases into the "knuckles" and add an almond to one end of the cookie for a "fingernail." Be sure to secure the almond well. I pushed it down and formed the cookie dough around the sides.

Bake the cookies for about 8 minutes or until the edges just being to brown. Remove from the oven and allow to cool on the baking sheet for a few minutes before moving the cookies to a cooling rack. Repeat with the remaining dough.

Peach Coffee Cake

How is it that I never seem to realize the days are getting shorter until the first cool September day? Suddenly the sunlight looks a bit warmer on my bike ride home from work, summer flowers are few and far between, and neighborhood gardens are bursting with tomatoes and zucchinis. I'm one of the most enthusiastic autumn-lovers you can find, but the changing seasons aren't without a bit of sadness to see another summer come to a close. Luckily, Peach Coffee Cake is the perfect recipe to ease the transition.

September in Champaign

Midwesterners, be sure to visit your farmers market over the next two weeks to get the last of the juicy freestone peaches. Tell them you are baking, and perhaps your farmer will throw in a few slightly bruised extras like mine did. (What a nice treat!) Though, if you can't find any, this recipe will also work well with plums or apricots.

Peach Coffee Cake Adapted from Dorie Greenspan's Dimply Plum Cake

Ingredients

1 1/2 C flour
2 tsp baking powder
1/4 tsp salt Scant
1/4 tsp ground cinnamon
5 Tbl unsalted butter, at room temperature
3/4 C (packed) light brown sugar
2 large eggs
1/3 C flavorless oil, such as canola or sunflower
1 tsp grated lemon zest
1 1/2 tsp pure vanilla extract
5 freestone peaches, pitted and halved*

Method

Center a rack in the oven and preheat the oven to 350F.

Butter an 8-inch square baking pan, dust the inside with flour, tap out the excess and put the pan on a baking sheet.

In a medium bowl, whisk together the flour, baking powder, salt and cinnamon.

In a second medium bowl and working with a mixer, beat the butter at medium speed until it’s soft and creamy, about 3 minutes. Add the sugar and beat for another 3 minutes, then add the eggs, one at a time, and beat for a minute after each egg goes in. Still working on medium speed, beat in the oil, zest and vanilla—the batter will look smooth and creamy, almost satiny. Reduce the mixer speed to low and add the dry ingredients, mixing only until they are incorporated.

Run a spatula around the bowl and under the batter to make sure there are no dry spots, then scrape the batter into the pan and smooth the top. Arrange the peaches cut side up in the batter, jiggling the peaches a tad just so they settle comfortably into the batter.

Bake for about 40 minutes, or until the top is lightly browned and puffed around the peaches and a thin knife inserted into the center of the cake comes out clean. Transfer the cake to a rack and cool for 15 minutes—during which time the peach juice will seep back into the cake—then run a knife around the sides of the pan and unmold the cake. Invert and cool right side up.

Once cool, dust the cake with powdered sugar to serve.

(*I used four halves in the center of the cake. Then, I cut away the bruised parts of large peach and sliced the remaining pieces. I placed these smaller pieces along the perimeter of the cake, making sure a bit of batter remained between the baking pan and the peach slices.)

Strawberry Shortcake

This has been the first summer that has really felt like summer to me in a long time. Soaring temperatures, breezy bike rides, patio drinking, vacations, great food, old friends, new friends, grad school classes, and barely a moment to sit still - just the way I like it.

Summer Dinner Party 23

I've been fortunate to spend a lot of time with my family this summer and we recently had a large reunion for my father's side of the family. My grandparents had six children and - counting spouses and great grandchildren - there are about 40 of us now. We are lucky to be so close-knit for a large family, especially considering that we are spread throughout the country and the world.

Grandpa Then Grandpa Now

The driving force behind this family reunion was to celebrate my grandfather's 90th birthday. That's the two of us in 1986 and again just recently. We spent three days in Lake Geneva, Wisconsin dining, going through old photos, and enjoying my grandfather's land. I'm hoping I inherited some of my grandparent's good genes - they are both in excellent shape. In fact, my grandfather's birthday gift was a new chainsaw and he and my father are out at the land clearing away fallen trees from the most recent storm as I write this.

It's hard to believe it is already August. I've started to frantically make all of the summer dishes that I know I will miss when late September rolls around. Growing up, strawberry shortcake usually included store bought angel food cake. While I still have a special place in my heart for that distinctive flavor, you can't beat the real thing. The shortcakes in this recipe are easy to make and it's worth turning on the oven for in the hot August heat.

Strawberry Shortcake Serves 10

For the shortcakes:

Ingredients

4 C all-purpose flour
2 Tbl baking powder
¾ tsp. salt
6 Tbl sugar
1 ½ sticks (12 Tbl) cold unsalted butter, cut into small pieces
1 ½ C cold heavy cream

Method

I use Dorie Greenspan's recipe for Tender Shortcakes, which you can find here.

For the strawberries and cream:

Ingredients

2 lb fresh strawberries, rinsed 2 Tbl sugar 1 ½ C cold heavy cream

Method

Thinly slice the strawberries. Add to a medium bowl and add the sugar. Gently toss the strawberries to coat and let them sit at room temperature for about 20 minutes, periodically stirring to distribute the sugar. Refrigerate until you are ready to use the mixture.

Just before you are ready to serve the strawberry shortcakes, add the heavy cream to medium bowl and whip with a hand mixer until light and airy. Don't over mix.

To serve, place a shortcake on a plate (you can gently slice them in half if you'd like, but I leave them whole), top with a few dallops of whipped cream and a few spoonfuls of strawberries.

Beet Ice Cream

It never feels like summer until July, when the midwest gets hit with the first dangerous heat wave and the humidity becomes overwhelming. Everyone likes to complain about it, including me, but I secretly appreciate the extreme temperatures that mark our seasons in this region. When I lived in Oregon, I was always felt a bit melancholy when fall, winter, and spring would blend together into one entirely tolerable season.

I recently spent a nice weekend in Milwaukee with part of Nick's family. I always forget how different Lake Michigan looks further north. It appears more accessible, without a messy Navy Pier and fewer people.

Lake Michigan

I've been traveling non-stop this summer (usually only as far as Chicago, thankfully). Between the beginning of May and the end of August, I'll have spent only three weekends here, and one of those was to move. I'm lucky to be so busy, but I hardly know what to do with myself when I don't have to scramble to catch a train on a Friday these days.

My weekend plans include a bike tune-up, a visit to the Urbana Farmers Market, and a long run. I'll also be finishing off a batch of Beet Ice Cream as the next heat wave rolls in. I used this recipe from Serious Eats (omitting the chocolate), but next time I am going to try Thomas Keller's. The Serious Eats recipe was nice, but it didn't end up as creamy as I'd hoped. (For those of you questioning whether beets and ice cream should be paired, let me assure you that while it is different, I think it is delicious. There is a natural sweetness to beets, of course, and the earthiness mellows out the rest of the sugar in the recipe.)

Sweet Sourdough Cake

In the last seven years I have lived in no less than seven different homes. I'm sure many of you can relate. I've always loved getting to know new streets and neighborhoods -- enough to put up with an annual schedule of packing and moving and unpacking. My latest summer move took place last weekend and I couldn't be happier with the change.

New House

When I first left Chicago for grad school last year, I found a suitable home and roommates by way of Craigslist. It was a fine arrangement, but the house was small for three people and we didn't have anything in common. Ultimately, it was just a place to sleep and fix quick meals.

I'm thrilled to be recently installed in a gorgeous, sun-filled house with two great women from my program. The family that owns the house is on sabbatical in Switzerland until late December -- exactly when we all plan to be graduating. Not only is the timing perfect, but the big dining room and garden patio already have dinner party planning in full swing.

Woodstock

This recipe comes to me couresty of my parent's neighbor Audrey (who you might remember from her amazing Raspberry Chocolate Torte recipe). Audrey gave me a portion of starter and a print out of the recipe, and after a bit of research, I found that the recipe is from a popular "chain-letter" starter called Amish Friendship Bread. The original cautions not to use metal containers or utensils, to keep the starter un-refrigerated, and to use only ceramic or plastic bowls. I haven't tested these recommendations.

You can find the recipe here. I modified the recipe by adding one cup of whole wheat flour to the starter on the tenth day instead of all-purpose. I also omitted the vanilla instant pudding and the nuts entirely and I didn't miss either of them. The cake is a bit like a quick bread, but the sweet sourdough starter gives it a more complex flavor. The cake is excellent served wtih some berries and plain yogurt.

Carrot Cake Recipe & Six Years of Pro Bono Baker

Six years ago today, I searched the internet for a recipe while making dinner in Hyde Park, Chicago and discovered the world of food blogs. My first few dozen posts were nothing to write home about, but I quickly became hooked on this worldwide community of food lovers -- and this website as a place to catalogue my favorite recipes. 

Christmas Carrot Cake

Thank you dear readers, commenters, rss subscribers, flickr photo viewers, and twitter followers. I am continually honored to share this part of my life with you, and grateful that many of you do the same. This community grows rapidly each year, and while I have to admit to missing some of the intimacy and the earnestness of the early years, I am grateful for the inspiration and friendship that each new year brings. 

Christmas Carrot Cake

Best wishes to you all. I look forward to cooking with you in this new year!  I am off to New York for a long weekend and I leave you with this wonderful, classic carrot cake recipe. 

Carrot Cake with Cream Cheese Frosting

Adapted from Bon Appetit

Ingredients:

For the cake:

2 C flour
2 tsp baking powder
2 tsp baking soda
1 tsp salt
1 tsp ground cinnamon
½ tsp freshly grated nutmeg
¾ tsp ground ginger
1 ½ C sugar
1 C vegetable oil
4 large eggs
½ C unsweetened applesauce
3 C finely grated peeled carrots

For the frosting:

16 oz. cream cheese, at room temperature
½ C unsalted butter, at room temperature
2 ¼ C powdered sugar, or to taste
3 tsp vanilla extract
1 tsp lemon juice

Method:

Preheat oven to 325°F.

Lightly grease three 9-inch round pans with butter. Line the bottom of the pans with lightly greased parchment paper.

In a medium bowl, combine the flour, baking powder, baking soda, salt, and spices. 

In a large bowl, beat the sugar and oil until combined. Add the eggs one at a time, beating well to incorporate after each addition, followed by the applesauce. Add the dry mixture to the wet ingredients and beat to incorporate. Add the carrots and gently combine.

Divide the batter evenly between the pans. Bake, rotating the cakes once or twice during baking, until they begin to pull away from the sides of the pan and a toothpick inserted into the center comes out clean, about 35 minutes. Cool the cakes in their pans for 15 minutes before turning out onto wire racks to cool completely.

For the frosting, beat the cream cheese and butter in a medium bowl until smooth.  Sift in the powdered sugar and beat to incorporate. Add the vanilla and lemon juice and beat to combine. 

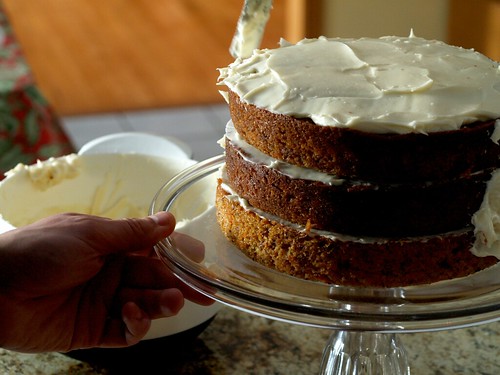
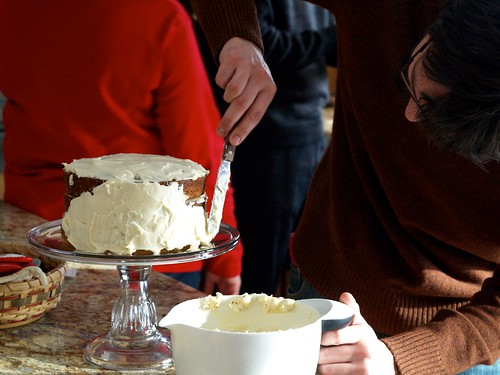
Place one cake layer on a cake stand and spread with ¾ cup frosting. Place another layer on top and repeat. Finally, add the third layer and spread the remaining frosting over the top and sides. Serve the cake at room temperature.

Nick and I decided to make this cake for Christmas and we knew oven space would be scarce. We made the cake layers on Christmas Eve and wrapped them tightly in plastic wrap once they were cooled completely.  The cake kept well overnight. 

Maple Cookie Recipe

As I biked home tonight on the last day of November through high winds and snow flurries, it suddenly seemed appropriate to start thinking about holiday cookie baking. These maple syrup butter cookies are the perfect treat as the temperature dips. It's always a bit sad to notice the last of the leaves have fallen from the trees, but I look forward to winter for clear skies, gorgeous sunsets, clementines, and time with family and friends. 

Thanksgiving Sunset

For the first time in years, I had a full week of vacation for Thanksgiving. I spent a few days in Chicago seeing off friends who are moving away, I joined my mother and my brother for a tour of our family's old neighborhood on the southside, and I spent some quality time in Logan Square.

Barges on the Illinois River

Our Thanksgiving was small and cozy. Nick made his Chile Glazed Sweet Potatoes and I made my Molasses Pumpkin Pie with fresh pumpkin puree from our neighbor. After the holiday, my parents and I traveled a few hours south to Starved Rock State Park where we hiked through the canyons, watched hawks over the Illinois River, and read by the fireplace in the old lodge. It was a great way to relax before returning to finals, presentations, and research papers as I finish my first semester of library school.

Maple Cookies

Cookies adapted from Gourmet

Icing adapted from Homegrown Happy

Makes 5 dozen

Ingredients

Cookies:

1 C unsalted butter, softened
1 C sugar
1/2 C Grade B maple syrup
1 large egg yolk
1 tsp salt
3 C all-purpose flour

Icing:

2 C powdered sugar
1 Tbl butter, softened
4 Tbl Grade B maple syrup
1/2 tsp vanilla
1 Tbl milk (or a dash more, if necessary)

Method:

In a medium bowl, mix together the butter and sugar until light and fluffy. Add maple syrup and egg yolk, stirring well. Sift flour and salt over batter and combine thoroughly. Roll dough into a log one-foot long and wrap dough in plastic wrap. Chill until firm, at least two hours (can be made ahead).

Preheat oven to 350F

Cut dough into 1/8 inch pieces and place on a baking sheet lined with parchment or a silicone mat. Bake cookies until the edges are golden, about 12 minutes. Transfer to racks to cool. Cookies will keep in an airtight container for one week. 

For the icing, sift powdered sugar into a medium bowl. Mix in butter until smooth. Stir in maple syrup and vanilla. Add milk a bit at a time until the icing is the desired consistency. Spread a bit of icing on to each cookie and allow to set. 

Molasses Pumpkin Pie

One of the things I love most about Thanksgiving, besides family and friends of course, is the opportunity to try new recipes. Each year, I bookmark new ideas for Brussels sprouts, mashed potatoes, and dinner rolls. Though, there is undeniably some comfort in tradition. My mother always makes the turkey and I always make this Molasses Pumpkin Pie. The molasses works perfectly with the pumpkin and spices, giving it a subtle spin on the average pie. 

November

Molasses Pumpkin Pie

Ingredients

1 pie crust, rolled out and chilled in a pie dish
2/3 C brown sugar
1/2 C white sugar
2 Tbl flour
1/2 tsp cinnamon
1/8 tsp each of: allspice, cloves and ginger
1/2 tsp salt
1 1/2 C canned pumpkin
2 Tbl molasses
1 tsp vanilla
3 large eggs
1 C whipping cream

Method

Place a baking sheet in the oven and preheat to 450F.  Combine sugars, flour, spices and salt in a large bowl.  Add the pumpkin, molasses, vanilla and eggs and incorporate the cream last.

Pour batter into chilled pie crust and bake for ten minutes.

Reduce oven heat to 325F and bake for another 40 to 45 minutes.  The middle should be set and the sides of the pie should puff up a bit.

Allow pie to cool and serve at room temperature or chilled. 

I usually whip any excess cream with a touch of vanilla to serve along with each slice.   This pie can be made up to a day ahead, making it easy for large holiday dinners.

Happy Thanksgiving to my U.S. readers!