Roasted Asparagus with Balsamic & Oregano

When I started this website over six years ago, I had a second-hand point and shoot camera and no understanding of white balance. I've come along way since those early days and I've even sold a few photos, but I'm constantly trying to improve. Some days I shoot photos that I am really proud of, other days I can't seem to get close to what I want. This weekend, I'm extremely pleased to be taking part in the creativeLIVE free food photography course with my (hands-down) favorite food photographer, the incredible Penny De Los Santos. If you have any interest in food photography, I highly recommend joining in.
Dandelion

I recently bought my first real DSLR camera. A Canon 60D with a 50mm f/1.4. It was quite a financial splurge, but I was lucky to find manufacturer refurbished pieces for a bit less than expected. I have a lot to learn, but I'm loving it. Many thanks to Penny and creativeLIVE for offering a free class. It's fascinating to watch Penny's work-flow and I'm learning a ton.

Roasted Asparagus

The farmers market is bursting with gorgeous bunches of asparagus. This is a nice side dish for hot early summer days. It has a lot of flavor, but it only requires a short time in the oven so your home won't overheat.

Roasted Asparagus with Oregano and Balsamic

Ingredients

25 spears of asparagus
2 Tbl olive oil
salt
black pepper, freshly ground
2 Tbl oregano leaves, fresh
2 Tbl oregano
balsamic vinegar*
Parmesan

Method

Preheat oven to 375F. Wash and trim the asparagus spears. Arrange in a single layer on a roasting pan, drizzle with olive oil, and season with salt and pepper. Use your hands to evenly coat the spears. Top with oregano. Bake for 15 minutes. Rotate and shake the pan to turn the asparagus while baking.

Remove the asparagus from the oven when it is bright green and beginning to slightly char. Season with balsamic and shaved parmesan. Serve immediately.

(*Any balsamic will work. The sweetness is a perfect complement to the other flavors in this dish. I have an assortment of wonderful vinegars form Old Town Oil in Chicago. This oregano balsamic has a subtle flavor that really shines here.)

Red Pepper, Spinach & Feta Quiche

I have a large extended family and holidays have always meant traveling to parts of Chicago or Wisconsin. The one exception was always Easter. My family would host a small gathering, typically just my mother's side of the family, and I have fond memories full of sunshine and good food.

This year will be different. A beloved aunt passed away last summer. All of the Schwab cousins have moved away. My brother recently moved to Seattle. And I need to be on my way back to school by early Sunday morning.  We've decided it doesn't make sense to plan a party this year. I'm in agreement, but there is still something sad about a tradition ending. Perhaps next year...

Seattle

That said, there is a lot to look forward to this weekend. I am attending the eChicago Conference for the second time. Last year I had been accepted to my LIS school, but I was keeping it a secret from co-workers. It will feel good to be able to more fully engage in the library & information science side of the conference this year.

My mother has her first official Chicago Architecture Foundation tours scheduled for next week. On Saturday we are going to meet for her last trial run. It's pretty awesome to get preview tours all the time now. She is a smart lady. I don't think I would be able to remember all the details she shares on her two-hour tour.

P4124478.jpg

For those of you celebrating Easter this weekend, or those of you simply looking for a weekend brunch dish, this is my favorite quiche recipe. It is simple, but full of flavor.The bright colors makes me think of sunny spring days, even though we haven't had too many of those yet this year.

Red Pepper, Spinach and Feta Quiche Adapted from Gourmet Magazine

Ingredients

1 pie crust
1 Tbl olive oil
2 C packed fresh spinach, washed and trimmed
1/3 C sliced red bell pepper
1/2 tsp fresh thyme
3 eggs
1/2 C heavy cream
6 oz feta cheese, crumbled
salt and pepper
Fresh chives for garnish - optional

Method Preheat oven to 425F, place a baking sheet on the middle rack.

Place prepared pie crust in a deep dish pie pan.

Over medium heat, sauté bell pepper in oil for one minute.  Add spinach and sauté until wilted.  Season pepper and spinach mixture with salt and pepper.

In a medium bowl, whisk the eggs, thyme, and cream together.

Arrange feta over bottom of pie shell, place pepper and spinach mixture on top.  Pour egg and cream mixture over the other ingredients.

Bake on the baking sheet for 15 min.

Reduce heat to 350F and bake another 30 minutes, until set and the center is slightly puffed up.  Watch carefully so that crust does not burn.*

Serve warm or cool. Garnish with chives if desired.

*I find that baking times for this dish tend to vary quite a bit depending on the oven. If you are trying to time this dish for serving, I'd recommend leaving an hour for baking. Watch the crust and cover the edges with tin foil if you are worried it might burn.

Green Milkshake Recipe

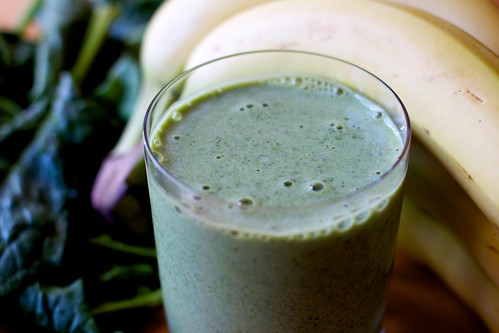
For those of you in the United States, the words "green milkshake" might conjure thoughts of the seasonal shamrock-variety. Other than the hue, this recipe has little in common with the fast-food version. Sunshine, bike rides, and outdoor runs have me craving refreshing foods. This green milkshake is a wonderful way to start the day full of energy. 

I grew up with blenders that couldn't chop ice any better than a hand mixer, and perhaps as a result I have long coveted fancy blenders like Vitamix. But, working within my grad student budget, I recently began to look into lower-end models. I decided to try my luck with a $15 model from Hamilton Beach and I couldn't be happier. Now I just hope the motor lasts more than a season. 

Green Milkshake

Green Milkshake

Ingredients

1 Tbl chia seeds
1 Tbl organic flaxseed oil*
1/2 Tbl organic wheat grass powder*
1 handful of organic spinach leaves (no need to trim thick stems)
1 banana
1/2 C hormone-free milk
Ice

Method

Add the ingredients in the order they appear above. Blend until smooth. Serve immediately. I like to use organic products for this recipe, but I generally don't go out of my way to buy organic bananas. 

*These ingredients are optional. For flaxseed oil, I use Barlean's. For wheat grass powder, I use Amazing Grass. These items are a pricey initial investment, but they will last you quite a while.  

Pea, Lemon & Crème Fraiche Pasta

The snow is gone, my bike tires are filled, and I'm anxiously waiting for a spring day that isn't too cold, windy or rainy. It's a bit of project to get to a good grocery store here without a car. I look forward to the imminent biking days that will give me more freedom over my limited free time. 

March 16, 2010

While we wait for the beautiful days ahead, I give you a simple and bright recipe that is delicious with frozen peas, but even better with fresh spring peas. Use what you have available, and color me a bit jealous if you are already enjoying the bounty of the new season.

Pea, Lemon & Crème Fraiche Pasta

Ingredients

8 ounces spaghetti or linguine (I used whole wheat).
1 Tbl olive oil
6 cloves of garlic, minced
2 C of fresh or frozen peas
1 C of crème fraiche
1 Tbl lemon juice
1 tsp lemon zest
1.5 tsp kosher salt
Fresh ground black pepper

Method

In a large stockpot, bring salted water to a boil and cook the pasta until al dente. 

Meanwhile, heat the oil over medium-high heat in large skillet. Add the garlic and cook for 2 minutes until fragrant. Add the peas, cooking until they begin to brighten and are warmed through. 

While the peas cook, combine the crème fraiche, salt, and lemon zest in a medium bowl. When the peas have finished cooking, turn off the heat and toss the peas with the sauce. Stirring a minute or two to coat. Add the lemon juice and a generous amount of black pepper. 

Drain the pasta, reserving half a cup of the cooking water, and toss with the peas. If necessary, add the cooking water a tablespoon at a time until the sauce is your desired consistency. 

Roasted Cauliflower with Garlic Tahini Sauce

My second semester of graduate school is off to a busy start. I'm enrolled in four courses: Introduction to Databases, E-Government, Foundations of Information Processing (Python programming), and Libraries Information and Society (my last required course). The database and programming courses are very time consuming, but I'm keeping up and learning quite a bit.

In addition to my Graduate Assistantship, I am also doing a practicum this semester with the Sears User Experience & Taxonomy department in Chicago. And in March, I am spending my spring break in Ann Arbor as an assistant at the incredible Janice Bluestein Longone Culinary Archive.

Life is busy, but It's exciting to sense my previous experiences, coursework, and future aspirations synthisizing into something definable. I'm not sure where I'll end up next year, but I'm grateful for these current opportunities and the wonderful people I am meeting.

Chicago

My practicum has allowed me to spend quite a bit of time in Chicago already this semester. My mother is currently enrolled in the Chicago Architecture Foundation's rigourous docent training program. She recently took my brother and I on a practice tour of Historic Downtown: Rise of the Skyscraper and did an impressive job.

Art Institute of Chicago Marquette Building
Monadnock Chicago

It was a gorgeous early spring day and we talked about a number of my favorite buildings (clockwise from top left: Art Institute of Chicago, Marquette, Fisher, and Monadnack). It's pretty neat to have a burgeoning authority on the rich history of Chicago architecture in the family.

A recent series of sunny days and mild temperatures has melted most of the snow and the changing seasons have me feeling energized. I'm looking forward to dusting off my bike, long runs, and planning spring camping trips. Here is an easy recipe with bright flavors to welcome March.

Roasted Cauliflower with Garlic Tahini Sauce

Adapted from Saveur

Ingredients

1/4 C extra-virgin olive oil
4 tsp ground cumin
4 tsp turmeric
1 1/4 tsp hot paprika (divided)
2 heads cauliflower, cored and cut into 1 1/2'' florets
Kosher salt and freshly ground black pepper, to taste
1/2 C tahini
1/2 C water
3 cloves garlic, smashed and minced into a paste
1 tsp Siracha
Juice of 1 lemon

Method

Preheat oven to 500F. On a large baking sheet, combine the oil, cumin, turmeric, one teaspoon of paprika, salt, black pepper, and cauliflower. Spread evenly and bake for 30 minutes, rotating the pan halfway through, until the cauliflower is brownded and tender.

Meanwhile, combine the tahini, water, garlic, Siracha, lemon juice, and the remaining quarter-teaspoon of paprika in a small bowl (don't worry, the water mixes in well and gives the sauce a great texture). Season with salt to taste.

Serve warm or at room temperature.

Warm White Bean & Carrot Salad Recipe

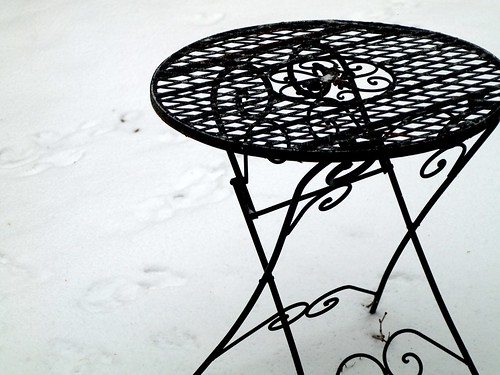
The midwest is bracing for what will reportedly be a "dangerous, multifaceted and potentially life-threatening" blizzard. Reports of incoming extreme weather tend to be over-blown in these parts, but that type of language will definitely get some attention. 

Winter

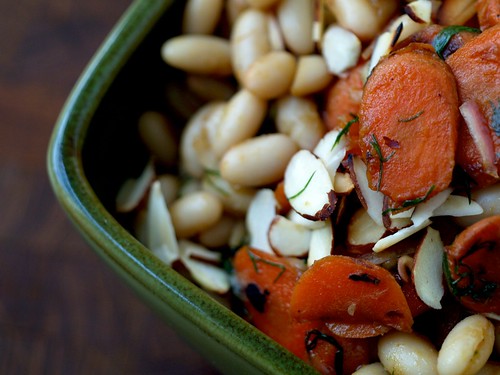
The first snowflakes started to fall half an hour ago, and as I type this an intriguing combination of snow, hail, and rain is tapping at my dining room windows. Perhaps it would be wise to heed the weather warnings and plan a stop at the grocery store this evening to stock up on ingredients for some satisfying snow-day fare. I recommend this Warm White Bean and Carrot Salad with dill, shallots, and toasted almonds.

Warm Bean and Carrot Salad with Dill 1

I followed this recipe from 101 Cookbooks. The only change I made was to cook the carrots in butter, which gave them a wonderful flavor. Be sure to let the dressing rest as the recipe instructs. This salad was best the day it was made, but kept well. 

Stay warm!

A Year in Photographs

January: Ukrainian candy store near my old office in Chicago.

Last year I joined many other photographers in an annual challenge to take 365 photographs, one each day of the year. I lasted until September when a combination of moving and starting gradute school got the better of me. Even though I didn't reach the goal I set out for myself, I did learn a lot through the sheer volume of the project, and I think my photography has improved ever so slightly. Here is one photograph from each month in 2010.

February 14, 2010

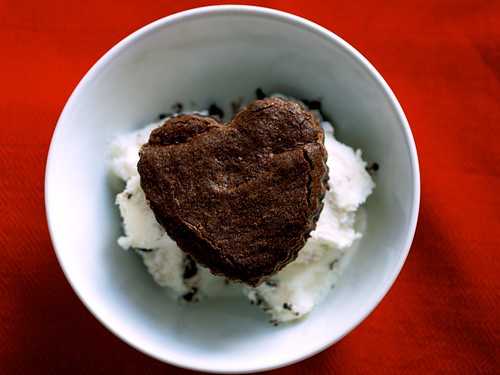
February: Valentine's Day.

March 27, 2010

March: In San Francisco's Delores Park with old friends.

April 4, 2010

April: My mother's peach bellini on Easter.

May, 25, 2010

May: The old theater in Logan Square.

June 6, 2010

June: Caprese salad.

Boathouse

July: Summer vacation at the boathouse in Waupaca.

Bowman Lake

August: Hiking in Glacier National Park with my father.

Sunlight

September: My new apartment in Champaign.

Farmers Market Squash

October: Market squash prepared for roasting.

Barges on the Illinois River

November: Barges on the Illinois River near Starved Rock.

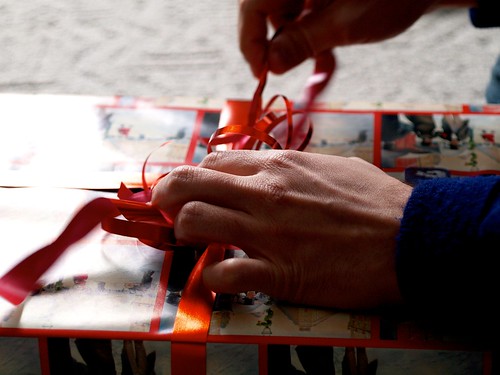
Christmas Gifts

December: Nick opening gifts on Christmas morning.

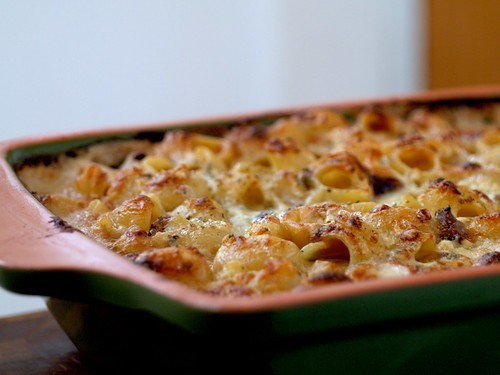
Macaroni and Blue Cheese with Figs and Rosemary

Macaroni and cheese is the epitome of comfort food. It's not so bad out of the box, but nothing beats homemade. Sharp white cheddar, Roth Käse Buttermilk Blue Cheese, rosemary and black mission figs make this a deeply flavorful version fit for a special occasion. This dish is decadently rich. Serve it with crusty bread, a simple salad, and a glass of white burgundy for a delicious dinner.

Macaroni and Blue Cheese with Figs and Rosemary

This recipe calls for quite a bit of blue cheese, but the flavors come together perfectly and the cheese melts beautifully into the sauce. Just be sure to go easy on the salt as you are cooking. I usually don't like breadcrumb toppings on baked macaroni and cheese, so I developed this recipe without it. Feel free to add in this step if you desire. 

Macaroni and Blue Cheese with Figs and Rosemary

Serves 8 to 10 people

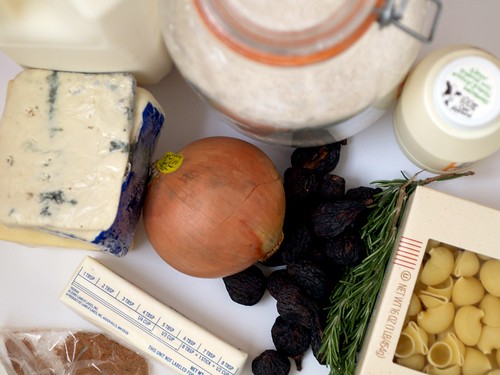
Ingredients

1 lb pasta (I used pipe rigate, but rigatoni or rotini would work well too)
10 Tbl butter, divided
1 1/4 C dried black mission figs, diced
1 1/4 Tbl fresh rosemary, chopped
1/2 yellow onion, finely chopped
1/2 C flour
3 C whole milk
2 C heavy cream
1/8 tsp nutmeg, ground
12 oz. sharp white cheddar cheese, grated
6 oz. blue cheese, crumbled and divided
salt and fresh ground black pepper

Macaroni and Blue Cheese with Figs and Rosemary

Method

Preheat oven to 400F. 

Grease a two-quart baking pan with one tablespoon butter and set aside.

Bring salted water to a boil in a six-quart pot. Cook pasta until al dente. Drain well and add the pasta to the baking dish. Toss with two tablespoons of butter. Set aside.

Macaroni and Blue Cheese with Figs and Rosemary

In a six-quart pot, melt the remaining seven tablespoons of butter of medium heat along with the onions, figs, and rosemary. Cook until the onion is soft, about six minutes. Whisk in the flour and cook an additional two minutes. Whisk in the milk and cream, and increase the heat to medium-high.  Cook, while whisking, for 10 to 12 minutes, or until fairly thick. 

Remove the pot from the heat and whisk in an 1/8 teaspoon of salt, 1/8 teaspoon of fresh ground black pepper, and the 1/8 teaspoon of nutmeg.  Quickly mix in the cheddar and the 3/4 of the blue cheese. (I find it is helpful to work in batches.)
Macaroni and Blue Cheese with Figs and Rosemary

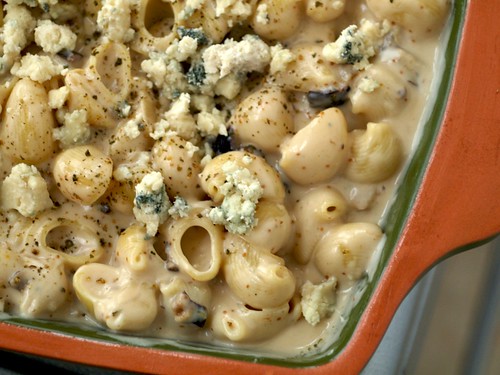
When the mixture is smooth, pour it over the pasta.  Use a wooden spoon to gently mix the pasta and sauce together. Dot the top of the dish with the remaining blue cheese and a bit of salt and pepper. 

Bake in the preheated oven for 25 to 35 minutes, until bubbling and slightly browned. 

Macaroni and Blue Cheese with Figs and Rosemary

Disclosure: I was asked to develop this recipe for the second annual "30 Days, 30 Ways" Mac and Cheese event hosted by the Wisconsin Milk Marketing Board. I received compensation for my participation. 

Carrot Cake Recipe & Six Years of Pro Bono Baker

Six years ago today, I searched the internet for a recipe while making dinner in Hyde Park, Chicago and discovered the world of food blogs. My first few dozen posts were nothing to write home about, but I quickly became hooked on this worldwide community of food lovers -- and this website as a place to catalogue my favorite recipes. 

Christmas Carrot Cake

Thank you dear readers, commenters, rss subscribers, flickr photo viewers, and twitter followers. I am continually honored to share this part of my life with you, and grateful that many of you do the same. This community grows rapidly each year, and while I have to admit to missing some of the intimacy and the earnestness of the early years, I am grateful for the inspiration and friendship that each new year brings. 

Christmas Carrot Cake

Best wishes to you all. I look forward to cooking with you in this new year!  I am off to New York for a long weekend and I leave you with this wonderful, classic carrot cake recipe. 

Carrot Cake with Cream Cheese Frosting

Adapted from Bon Appetit

Ingredients:

For the cake:

2 C flour
2 tsp baking powder
2 tsp baking soda
1 tsp salt
1 tsp ground cinnamon
½ tsp freshly grated nutmeg
¾ tsp ground ginger
1 ½ C sugar
1 C vegetable oil
4 large eggs
½ C unsweetened applesauce
3 C finely grated peeled carrots

For the frosting:

16 oz. cream cheese, at room temperature
½ C unsalted butter, at room temperature
2 ¼ C powdered sugar, or to taste
3 tsp vanilla extract
1 tsp lemon juice

Method:

Preheat oven to 325°F.

Lightly grease three 9-inch round pans with butter. Line the bottom of the pans with lightly greased parchment paper.

In a medium bowl, combine the flour, baking powder, baking soda, salt, and spices. 

In a large bowl, beat the sugar and oil until combined. Add the eggs one at a time, beating well to incorporate after each addition, followed by the applesauce. Add the dry mixture to the wet ingredients and beat to incorporate. Add the carrots and gently combine.

Divide the batter evenly between the pans. Bake, rotating the cakes once or twice during baking, until they begin to pull away from the sides of the pan and a toothpick inserted into the center comes out clean, about 35 minutes. Cool the cakes in their pans for 15 minutes before turning out onto wire racks to cool completely.

For the frosting, beat the cream cheese and butter in a medium bowl until smooth.  Sift in the powdered sugar and beat to incorporate. Add the vanilla and lemon juice and beat to combine. 

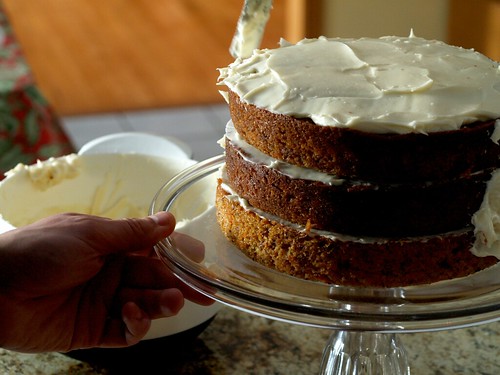
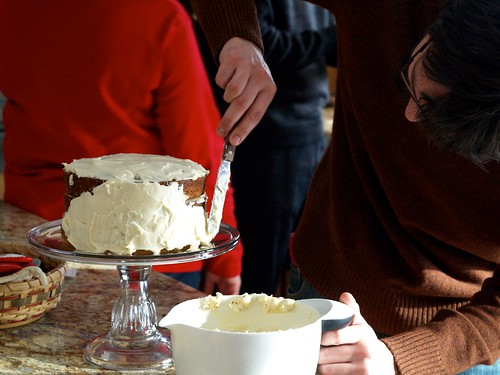
Place one cake layer on a cake stand and spread with ¾ cup frosting. Place another layer on top and repeat. Finally, add the third layer and spread the remaining frosting over the top and sides. Serve the cake at room temperature.

Nick and I decided to make this cake for Christmas and we knew oven space would be scarce. We made the cake layers on Christmas Eve and wrapped them tightly in plastic wrap once they were cooled completely.  The cake kept well overnight. 

Fennel and Radicchio Winter Salad Recipe

December 1 (5)

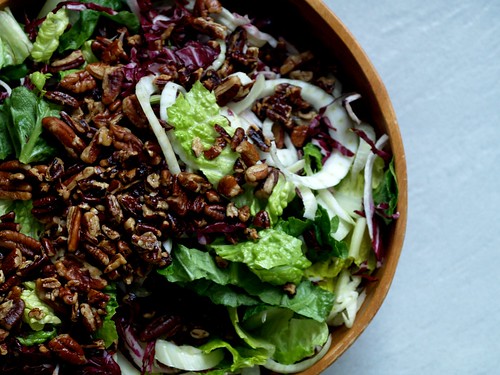
I celebrated Christmas at my parent's house this year and Nick and I were put in charge of making the salad and dessert. We made a delicious carrot cake (which I will tell you more about next week) and this vibrant winter salad. Hardy fennel and radicchio are available in most places during the winter and their bold flavors are strong enough to complement the pecorino, toasted pecans, and savory dressing in this recipe. I followed Faith Durand's recipe at The Kitchn exactly. Next time, I might try this with a more citrusy dressing - though the soy sauce based option was nice.

December 5

I've been working more hours than I expected at the American Library Association and I am really enjoying the experience. The people are wonderful and I feel useful. (Making a bit of extra money for next semester doesn't hurt either.) It has been fun to work in the Chicago Loop again, an area I especially love during the holiday season. 

December 2 (3)

Though, the full work schedule means that I haven't had the time I expected to reconnect with friends or work on personal projects. I had grand plans of finally redesigning and moving this website, working on my XML skills, and enjoying parts of Chicago that I don't often get to visit. I have been able to visit with most of my extended family though, and for that I am very grateful. 

December (4)

Nick made me a beautiful book of some of his favorite recipes from this website for Christmas. He did all of the layout by hand, making it a far more time-consuming - and more beautiful - book than the ones I typically order for loved ones through online photo services. It was a nice way to look back on the last several years. I still have a lot to learn, but it is encouraging to see a physical representation of how my photography has improved since the early days in 2005. I am sometimes tempted to tear everything down and reshoot it all - but other days I appreciate the steady progress this website displays. 

December 2010 7

I hope everyone enjoyed some time off with friends and family over these past few weeks.  Have a happy and safe celebration this evening.  I look forward to sharing more photographs and recipes with you in the new year!

Mushroom Bourguignon Recipe

Mushroom Bourguignon

My first weekend back in Chicago was a snowy, blustery one. Roofs were blown off buildings, buses were traveling at a comically slow speed, and I made a trip to the nearest shoe store for some very ugly, but very waterproof snow boots. I was back in the city for a brief visit in order to interview for two winter internships with the American Library Association. I'm happy to report that I will be able to accept both of them and I'm looking forward to working with and learning from the APA and ALCTS staff members.

December at the University of Illinois 8

After my interviews, I took the train back to Champaign in order to work for a few more days at my graduate assistantship before officially leaving for winter break. Amazingly, I managed to work ahead over 45 hours this semester, which will allow me pursue other work experience with my time off from school. Campus is covered in a blanket of snow and ice, and though it is finals week, many students have already left and everything is quieting down.

December at the University of Illinois 4

Tonight, I will take my sixth train ride in six days back to Chicago - and hopefully stay put for a bit. Long days of travel and bracing cold have me hankering for warm, hearty dinners like this mushroom bourguignon.

Mushroom Bourguignon

Adapted from Smitten Kitchen

Ingredients

2 Tbl olive oil
2 Tbl butter, softened
2 lbs cremini mushrooms, in 1/4-inch slices (no stems)
1 small carrot, finely diced
1 small yellow onion, finely diced
2 cloves garlic, minced
1 C full-bodied red wine
2 Cvegetable broth
2 Tbl tomato paste
1/2 tsp dried thyme leaves
1 1/2 Tbl flour
1 C frozen pearl onions, peeled and thawed
Salt and pepper
Egg noodles, for serving
Sour cream
Chopped Italian parsley for garnish

Method

Heat one tablespoon of olive oil and one tablespoon of butter in a heavy saucepan over high heat. Sear the mushrooms for three to four minutes.  The mushrooms should brown, but don't cook so long that they release their juices.  Remove the mushrooms from the pan and set aside.

Reduce the heat to medium and add one tablespoon of olive oil. Cook the carrot, onion, thyme, salt and pepper for about 10 minutes or until the onions begin to brown. Add the garlic and cook one more minute.

Add the wine to deglaze the pan, and then turn the heat all the way up and reduce the liquid by half. Add the tomato paste, broth, and the mushrooms- along with any juices. Bring the mixture to a boil and then simmer for 20 minutes, or until mushrooms are very tender.

In a small bowl, mix one tablespoon of butter with the flour until smooth. Add this mixture to the stew and simmer for 10 more minutes, or until the stew has the consistency your desire. Season to taste with salt and pepper.

Serve the stew over a bowl of egg noodles with a dollop of sour cream and a small handful of Italian flat-leaf parsley.

Savory Florentine Cake Recipe

It's hard to believe that my first semester of graduate school is nearing an end. After one more class and two more papers, I'll be in Chicago working at a soon-to-be-finalized internship and falling back into familiar habits. I'm looking forward to having a bit of time to focus on a few personal projects and to running on the Chicago lakefront as I train for the Illinois Marathon in April. 

Hattie

A few months ago, I received a review copy of Silvana Nardone's Cooking for Isaiah in the mail; a cookbook of gluten-free and dairy-free meals and the antithesis of my typical diet. I have a few friends with a gluten or dairy intolerance and I was drawn to some of the simpler recipes in the book. This Florentine Cake is quick, delicious, and it doesn't require any special ingredients. 

December at the University of Illinois 3

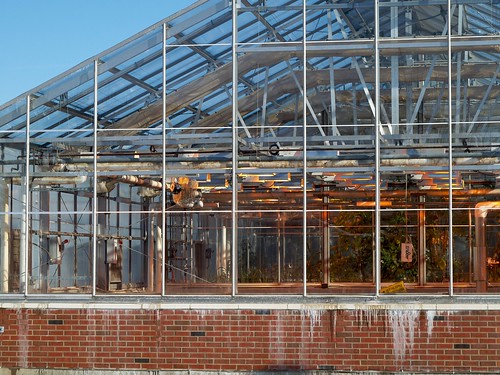
You are probably wondering why I'm posting a recipe that calls for fresh tomatoes in December. When I visited the winter farmer's market in Urbana this past weekend, one farm had some very nice greenhouse tomatoes. I bought a few with this recipe in mind. However, the dish would be great with oil-packed sun-dried tomato halves or even thin slices of winter squash.

Florentine Cake with Tomato-Garlic Gratin

Adapted from Cooking for Isaiah

(The original recipe called for 8 eggs and 1 clove of garlic)

Ingredients:

1/2 C rice cereal crumbs
3 cloves garlic, grated
1/2 tsp crushed red pepper flakes
Salt
1 Tbl olive oil, plus extra for drizzling
6 large eggs, at room temperature, lightly beaten
10 ounces frozen, chopped spinach, thawed and pressed dry
2 medium tomatoes, sliced 1/4 inch thick

Method:

Preheat oven to 350F

In a small bowl, combine the first four ingredients and set aside.

In a medium ovenproof skillet, heat the oil over medium-low heat. In a large bowl, combine the eggs, spinach, and 1 tsp of salt. Pour the egg mixture into the hot skillet, shake to even out, and place the tomatoes on top. Cook without stirring for about 4 minutes, or until the edges are set and the center is beginning to set. 

Top with the garlic crumbs and drizzle with olive oil. Bake for ten minutes or until golden and set in the center. Serve warm. 

Maple Cookie Recipe

As I biked home tonight on the last day of November through high winds and snow flurries, it suddenly seemed appropriate to start thinking about holiday cookie baking. These maple syrup butter cookies are the perfect treat as the temperature dips. It's always a bit sad to notice the last of the leaves have fallen from the trees, but I look forward to winter for clear skies, gorgeous sunsets, clementines, and time with family and friends. 

Thanksgiving Sunset

For the first time in years, I had a full week of vacation for Thanksgiving. I spent a few days in Chicago seeing off friends who are moving away, I joined my mother and my brother for a tour of our family's old neighborhood on the southside, and I spent some quality time in Logan Square.

Barges on the Illinois River

Our Thanksgiving was small and cozy. Nick made his Chile Glazed Sweet Potatoes and I made my Molasses Pumpkin Pie with fresh pumpkin puree from our neighbor. After the holiday, my parents and I traveled a few hours south to Starved Rock State Park where we hiked through the canyons, watched hawks over the Illinois River, and read by the fireplace in the old lodge. It was a great way to relax before returning to finals, presentations, and research papers as I finish my first semester of library school.

Maple Cookies

Cookies adapted from Gourmet

Icing adapted from Homegrown Happy

Makes 5 dozen

Ingredients

Cookies:

1 C unsalted butter, softened
1 C sugar
1/2 C Grade B maple syrup
1 large egg yolk
1 tsp salt
3 C all-purpose flour

Icing:

2 C powdered sugar
1 Tbl butter, softened
4 Tbl Grade B maple syrup
1/2 tsp vanilla
1 Tbl milk (or a dash more, if necessary)

Method:

In a medium bowl, mix together the butter and sugar until light and fluffy. Add maple syrup and egg yolk, stirring well. Sift flour and salt over batter and combine thoroughly. Roll dough into a log one-foot long and wrap dough in plastic wrap. Chill until firm, at least two hours (can be made ahead).

Preheat oven to 350F

Cut dough into 1/8 inch pieces and place on a baking sheet lined with parchment or a silicone mat. Bake cookies until the edges are golden, about 12 minutes. Transfer to racks to cool. Cookies will keep in an airtight container for one week. 

For the icing, sift powdered sugar into a medium bowl. Mix in butter until smooth. Stir in maple syrup and vanilla. Add milk a bit at a time until the icing is the desired consistency. Spread a bit of icing on to each cookie and allow to set. 

Molasses Pumpkin Pie

One of the things I love most about Thanksgiving, besides family and friends of course, is the opportunity to try new recipes. Each year, I bookmark new ideas for Brussels sprouts, mashed potatoes, and dinner rolls. Though, there is undeniably some comfort in tradition. My mother always makes the turkey and I always make this Molasses Pumpkin Pie. The molasses works perfectly with the pumpkin and spices, giving it a subtle spin on the average pie. 

November

Molasses Pumpkin Pie

Ingredients

1 pie crust, rolled out and chilled in a pie dish
2/3 C brown sugar
1/2 C white sugar
2 Tbl flour
1/2 tsp cinnamon
1/8 tsp each of: allspice, cloves and ginger
1/2 tsp salt
1 1/2 C canned pumpkin
2 Tbl molasses
1 tsp vanilla
3 large eggs
1 C whipping cream

Method

Place a baking sheet in the oven and preheat to 450F.  Combine sugars, flour, spices and salt in a large bowl.  Add the pumpkin, molasses, vanilla and eggs and incorporate the cream last.

Pour batter into chilled pie crust and bake for ten minutes.

Reduce oven heat to 325F and bake for another 40 to 45 minutes.  The middle should be set and the sides of the pie should puff up a bit.

Allow pie to cool and serve at room temperature or chilled. 

I usually whip any excess cream with a touch of vanilla to serve along with each slice.   This pie can be made up to a day ahead, making it easy for large holiday dinners.

Happy Thanksgiving to my U.S. readers!