Popovers

Popovers 3

Popovers are one of my favorite additions to a weekend breakfast.  These airy, eggy breads look impressive, but are fairly easy to prepare.  The one caveat is that, in my experience, investing in a real popover pan like the one pictured makes a huge difference. In an effort to avoid a single-use piece of equipment, my first popover attempts used muffin tins and yielded disappointing results. (I now use this popover pan from Chicago Metallic.)

Popovers 1 Popovers 2

Popovers

Makes six popovers

Ingredients

1 3/4 C half-and-half, warmed*
2 C flour**
3/4 tsp salt
1/2 tsp baking powder
3 eggs, at room temperature
2 Tbl butter, melted
1 Tbl Dijon mustard

Method

Heat the half-and-half in a saucepan over medium heat until just warm. In a large bowl, combine flour, salt and baking powder. In a second bowl, combine the eggs, milk, butter and mustard - beat well to combine.  Add the flour mixture to the egg mixture and stir until just combined. Let batter rest at room temperature for at least 30 minutes and up to 60 minutes.

Preheat oven to 450F with a rack in the middle of the oven. Heat the empty popover pan for 5 minutes.  Carefully remove from the oven and, working quickly, spray the pan with a nonstick cooking spray and fill the cups almost to the top with batter.

Bake for 15 minutes without opening the oven door. Reduce heat to 375F and bake for another 20 to 25 minutes, or until a rich golden brown. Remove popovers from oven and pierce the sides with a sharp knife to let steam escape (to ensure they won't collapse). Serve immediately with butter.

(*You can substitute whole milk. **I've used both all-purpose and bread flour (high-gluten) with good results.)

Popovers

Popovers 3

Popovers are one of my favorite additions to a weekend breakfast.  These airy, eggy breads look impressive, but are fairly easy to prepare.  The one caveat is that, in my experience, investing in a real popover pan like the one pictured makes a huge difference. In an effort to avoid a single-use piece of equipment, my first popover attempts used muffin tins and yielded disappointing results. (I now use this popover pan from Chicago Metallic.)

Popovers 1 Popovers 2

Popovers

Makes six popovers

Ingredients

1 3/4 C half-and-half, warmed*
2 C flour**
3/4 tsp salt
1/2 tsp baking powder
3 eggs, at room temperature
2 Tbl butter, melted
1 Tbl Dijon mustard

Method

Heat the half-and-half in a saucepan over medium heat until just warm. In a large bowl, combine flour, salt and baking powder. In a second bowl, combine the eggs, milk, butter and mustard - beat well to combine.  Add the flour mixture to the egg mixture and stir until just combined. Let batter rest at room temperature for at least 30 minutes and up to 60 minutes.

Preheat oven to 450F with a rack in the middle of the oven. Heat the empty popover pan for 5 minutes.  Carefully remove from the oven and, working quickly, spray the pan with a nonstick cooking spray and fill the cups almost to the top with batter.

Bake for 15 minutes without opening the oven door. Reduce heat to 375F and bake for another 20 to 25 minutes, or until a rich golden brown. Remove popovers from oven and pierce the sides with a sharp knife to let steam escape (to ensure they won't collapse). Serve immediately with butter.

(*You can substitute whole milk. **I've used both all-purpose and bread flour (high-gluten) with good results.)

Easter Recipes

Easter 
I'll be spending Easter with my family this weekend. I'm looking forward to seeing Neil Simon's Barefoot in the Park at our beautiful local Opera House with my mother, going for a long run on low-traffic rural roads, meeting the new baby my cousin and his wife recently added to the family, and spending time with my paternal grandparents who just returned from their winter sojourn in California. And all this will take place before Easter Sunday.  

Growing up, Easter was the big holiday that my family hosted.  We are light on culinary traditions, but the house was always full of family and well-hidden Easter baskets. Our numbers have dwindled over the years as people move away or add to their own families.  This year we are having a small group and my mother is hoping no one fusses too much over the food. She has the menu mapped out, but I may still try to sneak one or two of my favorite recipes into the spread. How does one best travel by train with a popover pan?

For those of you planning your holiday table, here are a few recipe ideas that may complement your main course.

Orange-Raspberry Scones

P3013393

We celebrated Nick's birthday this weekend with a visit to the Art Institute of Chicago, a party at home with some friends, and a superb dinner at the Publican. As the weekend rounded out, fresh baked scones seemed like the ideal accompaniment to our snowy Sunday afternoon.

P3013410

Orange-Raspberry Scones

Ingredients

2 C flour
2 Tbs sugar, plus more for sprinkling on top
1 Tbs baking powder
Grated zest of 1 orange
1/4 tsp salt
4 Tbs cold unsalted butter, cut into pieces
2 large eggs
1/2 C cold milk or cream
2 Tbs raspberry jam

Method

Preheat oven to 400F and line a baking sheet with a Silpat mat.

In a medium bowl combine the flour, two tablespoons of sugar, baking powder, orange zest, and salt. Rub in the butter with your hands (or cut in with a pastry cutter if you prefer) until it resembles a coarse meal.

In a second bowl whisk the eggs, milk and jam.  Add to the dry ingredients and mix into a shaggy dough.

Knead gently a few times and separate into 3 balls.  Form each into a 6-inch round (about 1-inch thick) and cut into 4 wedges.  Evenly space the wedges on the prepared baking sheet and bake for 15-20 minutes or until a golden brown crust forms.  Serve warm if possible.

Semolina Crackers

Cracker1

It's no secret that I love cheese.  While a good, crusty bread is typically my preferred accompaniment, I'll occasionally find myself staring at four dollar cracker boxes wondering if the selection is worth the money.  Making my own always sounded like a good solution, but the various recipes I tried yielded unexciting results -- until recently. 

Cracker2 

Nick and I hosted a birthday party for our friend Harold a few weeks ago and I came upon Wild Yeast's excellent cracker recipe just in time for the occasion. Susan's recipe calls for some special equipment like a kitchen scale, pasta roller and a baking stone. I don't own a pasta roller, so I decided to try my luck rolling the dough out with my trusty french rolling pin. I was able to get the sheets of dough very thin without much effort (just make sure your working surface and your pin are generously floured).  I will say that the kitchen scale and the baking stone are important elements of the recipe, however.

I only made one change to the recipe.  In lieu of sesame seeds I made one batch with freshly ground black pepper and one batch with caraway seeds.  I dusted both with coarse Kosher salt before baking. 

I agree with Susan, it will be a long time before I purchase packaged crackers again!

Thanksgiving Recipes

Rolls

I'm off to Ohio after work today.  Nick, Jerry and I rented a car and have a 7 hour drive ahead of us.  The Midwest roads are, so far, mercifully clear of snow.  I am trying two new recipes this year from two talented women: Orangette's Cream Braised Brussels Sprouts and The Pioneer Woman's Whiskey Glazed Carrots

For anyone still looking for menu ideas, I dug through nearly four years of Pro Bono Baker archives and have selected a few recipes that I think would be a welcome addition to any Thanksgiving table. Have a great holiday!

Drinks

Cynar Negroni
Lemon and Rosemary Spritzer

Side Dishes

Brussels Sprouts with Cannellini Beans
Brussels Sprouts with Pecans and Pecorino
Colcannon
Dave's Broccoli Salad
Herb-Roasted Hasselback Potatoes
Squash and Spinach Gratin

Vegetarian Mains
Fried Eggplant
Red Pepper, Spinach and Feta Quiche
Spinach Pie

Breads

Cheddar Biscuits
Lorie's Squash Dinner Rolls (pictured)
Potato and Cheddar Biscuits

Desserts

Audrey's Raspberry Chocolate Torte
Classic Pumpkin Pie
Honey, Pistachio and Rum Palmiers
Petrie Family Applesauce Cake

Syrian Onion Bread

Syrian1_copy

Today is World Bread Day. Kochtopf is hosting the third annual World Bread Day baking round up, and I made a batch to help celebrate.  In the spirit of the event, I decided to make something that I hadn't tried before and from another part of the world.  I came across a version of this recipe in Bread by Christine Ingram.  I made a few adjustments in order to achieve a smooth dough and account for dehydrated yeast. 

This bread is light and yeasty.  It expertly soaks up pasta sauce or gravy, but can also be split to use like pita bread.  The flavor combination in the topping is quite unique, but it works well.

Syrian2_copy

Syrian Onion Bread
Adapted from Bread by Ingram

Ingredients

4 C bread flour
1 tsp salt
1 package yeast
1.25 C lukewarm water (plus extra as needed)

4 Tbl finely chopped onion
1 tsp ground cumin
3 tsp ground coriander
2 tsp chopped fresh mint
2 Tbl olive oil

lightly flour 2 baking sheets

Method

Sift flour and salt together in a large bowl.

Mix the yeast with the water and cover with plastic film.  Let it rest in a warm place for ten minutes.  You should see bubbles/froth on the top if your yeast is active.

Add the yeast mixture to the center of the flour and mix to a firm dough.

Turn out on a lightly floured surface and knead for 10 minutes until smooth and elastic. Slowly add more water after several minutes of kneading, if necessary. 

Place in a lightly oiled bowl and cover with clear film. Leave to rise in a warm place for one hour or until doubled in bulk.

Punch down the dough and turn on to a lightly floured surface. Fold the dough over on itself once or twice and divide into 8 equal pieces.  Roll each out to 5-6 inch rounds, making them slightly concave. Prick each round all over with fork tines and space well apart on the sheets. Cover and leave to rise for 20 minutes.

Syrian3_copy

Preheat oven to 400F.

Mix the remaining ingredients in a small bowl.

Brush the breads with olive oil and sprinkle the topping evenly over each round.

Bake for 15-20 minutes, or until golden.  Serve warm.

Ken's Artisan Bakery

Pulled_pork_copy_3

Ken's Artisan Bakery in Portland, Oregon is largely responsible for my obsession with high quality breads. This was the first good U.S. bakery I encountered that branched out from whole grain loaves to stunning European-style breads and pastries.  Ken's brioche and cafe au lait became common study partners for me over those years, and I was truly sad to leave this wonderful bakery behind when I moved back to Chicago.

Croissant_copy

When Nick and I arrived at the Portland train station, we made our way directly to Ken's for lunch.  Though we had decided on sandwiches, I couldn't resist purchasing one of their mouthwatering croissants.  While explaining to Nick the reasons behind this addition to our lunch menu, the woman in front of us turned around to agree saying, "I lived in France for five years and I keep a vegan diet, but when I am back in Portland I always come here for one. They are the best."

Croque_copy

Nick ordered the Pulled Pork Barbecue on a ciabatta roll with fennel coleslaw (pictured first).  I ordered the Croque Portabello with bechamel, fresh thyme, and Gruyere on country bread.  While the train food was better than we had expected, devouring these divine sandwiches helped remind us that good food should taste fresh and satisfying. 

Croissant2_copy
Anyone who may fancy themselves a bread nerd should look at the "Essays" section on the Ken's Artisan Bakery website. With titles like, "What is Good Bread" and " Preferments for Better Living," Ken's essays are not only endearing, but full of first-hand advice from a baker that very clearly loves good bread.

Ken's Artisan Bakery
338 NW 21st Avenue
Portland, Oregon 97209

---------------------------------------------------
Tonight we are going to see Heart (You stay away from "Barracuda", Sarah Palin!) and on Sunday, after months of fundraising and training, I run the Chicago Half Marathon.  Wish me luck!


Vegetable Chili and Cornbread

Cornbread_4

We began our long weekend by making a big pot of vegetable chili and a loaf of cornbread to accompany it. The house smelled delicious and the food was hearty and satisfying.  (It also makes for a great lunch on the following days.) I hope everyone had a nice holiday weekend.  The Memorial Day Urban Golf event was a great success.  You can view some pictures of the event here.

Chili

Vegetable Chili
Serves 6

Ingredients

3 Tbl olive oil
1 large onion, coarsely chopped
6 large garlic cloves, chopped
2 large carrots, chopped
3 14.5-ounce cans diced tomatoes in juice
1 4-ounce can diced mild green chilies
3 Tbl chili powder
1 Tbl ground cumin
1 Tbl dried oregano
2 15-ounce cans kidney beans, drained
2 green bell peppers, cut into 1/2-inch pieces
1 10-ounce package frozen corn kernels
salt and pepper to taste
Shredded Cheddar cheese to serve
Sour cream to serve

Method

In a large stock pot, heat the oil over medium-high heat.  Add the onion, garlic, and carrots and cook for 5 minutes.  Add the tomatoes (with juice), chilies, and spices. Cook 10 minutes.  Add the beans, peppers and corn. Reduce heat and simmer for about 35 minutes, until thickened. Stir occasionally. Salt and pepper to taste.  Serve with shredded cheese and sour cream.

Cornbread
Adapted from Bread by Christine Ingram and Jennie Shapter

Ingredients

.75 C AP flour
1.5 C yellow cornmeal
1 tsp salt
1.5 Tbl baking powder
1 Tbl sugar
4 Tbl butter, melted
1 C milk
3 eggs
7-ounces canned sweetcorn, drained

Method

Preheat oven to 400F. Grease an 8.5 in cake tin.
Combine the flour, cornmeal, salt, baking powder, and sugar in a medium bowl. Make a well in the center.  In a separate bowl combine the butter, milk, and eggs. Add to the dry ingredients and stir until just combined. Stir in the sweetcorn and pour into the prepared tin.  Bake for 20 - 25 minutes, or until a knife comes out clean. Invert bread onto a wire rack and cool slightly.  Serve warm with honey or butter.

Argo Georgian Bakery - Revisited

Img_5441

After reading about the Republic of Georgia in the "cooking vacations" portion of the May Gourmet Magazine, I couldn't stop thinking about Argo Georgian Bakery.  I posted about my love of Argo over at Gapers Block on Friday and was lucky enough to make a trip up to Devon with Nick this afternoon. 

I haven't made khachapuri in a long time, but I plan to soon.  The Georgian Feast by Darra Goldstein is the best Georgian cookbook available, in my opinion, and provides the recipe that I typically use.  However, you could also try Nigella Lawson's recipe that The Traveler's Lunchbox provides (along with some stunning photos) or the recipe published in the aforementioned issue of Gourmet.

Tsoureki

Easter_3
From the archives.

Tsoureki (also called Lambropsomo) is an egg-rich Greek Easter bread that is traditionally served at the Resurrection Meal.  This meal marks the end of fasting for the Greek Orthodox Church and is often also comprised of an offal-based soup and a salad.  The dough is braided, sprinkled with sesame seeds and baked with partially boiled, red-dyed eggs to represent the blood of Christ.

There are dozens of Tsoureki recipes.  Some are flavored with orange peel and anise, others with sweet and sour mahlepi cherry spice, or with savory ingredients like the onion that I used in this recipe.

In order to avoid the color from the eggs running into your bread (like mine did), check Greek grocery stores around Easter time to find extra strong red dye.  Alternatively, soak or boil the eggs with onion skins to produce a lighter red, all-natural dyed egg.

Easter_bread

Tsoureki
adapted from Alberto at Il Forno

Ingredients

3.75 C unbleached all-purpose flour

1.25 C milk, at room temperature or a bit warmer

1 package active yeast

.5 C onion, finely chopped

6 Tbl butter, (soften 5 Tbl)

3 eggs, plus 2 egg yolks

1 tsp salt

1 Tbs honey

1.5 Tbl sesame seeds

Method

To make the starter: In a medium sized bowl combine 1.5 C of the flour,  4/5 C of the milk and the package of yeast.  Mix well and allow to sit in a warm location until bubbly and doubled in size (about 45 minutes).

Cook the onion with 1 Tbl butter over medium heat, until the onion is translucent.  Set aside.

Boil 2 of the eggs for about 5 minutes (they will cook more in the oven) and dye red.  Set aside.

Knead the starter with the remaining 2.5 C of flour, salt, honey, 1 egg and enough milk for the dough to just come together (about 3 Tbl).  The dough should be quite firm.

Add the the onion and the remaining butter 1 Tbl and at a time. Work the butter into the dough until it becomes shiny and elastic, (about 10 minutes). Cover the dough and leave to rise in a warm place until doubled in bulk (about 1 hour).

Once doubled, divide the dough into 4 equal piece.  Roll three of the pieces into ropes about 24 inches long. Roll the fourth piece into a rope about 48 inches long.  Due to the elasticity of the dough, it is easiest to roll each piece a bit at a time, allowing it to rest as you roll the other pieces.

With slightly wet hands, braid the three 24 inch pieces together (the moisture will help the pieces stick together).  Move the braid to a greased cookie sheet or a Sil-Pat mat and tuck the ends under.  Place the boiled, dyed eggs on top of the braid and wrap the longest piece of dough around the eggs to secure them (see the picture above). Gently cover the dough and allow to rise for 1.5 to 2 hours.

Preheat oven to 400F

Glaze with the egg yolks and sprinkle with sesame seeds.

Bake for 30 - 40 minutes.

Mirabelle Bakery

Bread2_2
(Mirabelle Bakery's Seeded Boule)
Many of my weekends over the past few months have started aboard a southbound train that deposits me 150 miles away from home in Champaign, IL.  Nick returned to finish his last year at the University of Illinois and we have been traveling back and forth to see each other since September.  We weren't particularly thrilled about the prospect of spending time in a central-Illinois college town, but the discovery of Mirabelle Bakery made it all a bit easier.
Foccacia
(Mirabelle Bakery's Onion and Rosemary Foccacia)
The bakery is closed on Sundays, so nearly every Saturday morning we make the half mile walk from Nick's apartment to downtown Urbana.  We stop at Strawberry Fields, the local natural foods store, for coffee and head up the street to wait in the perpetually-crowded storefront of Mirabelle.

Mexicancake
(Mirabelle Bakery's Coffee Cake)
We always select something to eat immediately on the park bench outside, and often purchase a loaf of fresh baked bread to accompany our dinner.  I am a glutton for traditional breads, and Mirabelle may have the finest baguettes that I have ever encountered in the United States.

Coconut_2
(Mirabelle Bakery's German Chocolate Pastry)
The only complaints I could possibly muster about Mirabelle would be their coffee which is a weak and pedestrian variety tucked away in a self-service corner.  But, I do visit for the breads and pastries and I would not suggest that they turn their attention away from these incredible offerings.

Onion
(Mirabelle Bakery's Onion Roll)
My favorite pastry of all is the Mirabelle Bakery Onion Roll.  The roll is soft and buttery, stuffed with poppy seeds, sour cream, red onions and an indescribable, delectable savoriness that makes my mouth water just thinking about it.  If you have occasion to visit Mirabelle Bakery, this would be my first suggestion to sample.

Foccacia2
(Mirabelle Bakery's Pesto, Tomato and Goat Cheese Foccacia)
If you have a heartier appetite, their foccacia servings are huge and easily make a meal.  The crumb is chewy and tender and the toppings are always very fresh.

Bread_2
(Mirabelle Bakery's Seeded Boule)
The other two highlights of Champaign-Urbana have been the Blind Pig, a beautiful bar with over 21 taps and Prairie Fruits Farm goat cheese.

Goatcheese
(Prairie Fruits Farm Herbes de Provence Goat Cheese)
This locally produced goat cheese can be purchased at Strawberry Fields, and while a bit pricey (about $7 for 6 oz.), it is worth every penny.  We do not have a car available to us, but I am hoping to find a way to make a trip out to the creamery in the spring, if the owners will have me, to see the farm's operation first hand. I often fantasize about making my own goat cheese and it would be fun to see a local example.

While we would both rather be living a normal life back in Chicago, it has been fortifying to find these high-quality, local and affordable establishments in a town with too many trashy sports bars and fast-food chains.  I have to admit that I didn't expect to miss things about Champaign-Urbana, but I will.

For an inside look at Mirabelle Bakery and to learn more about the food in Champaign-Urbana from a well-versed resident, visit the lovely blog Champaign Taste.

Mirabelle
127 W. Main
Urbana, IL 61801
217/384-6460

Banana Muffins

Banana_muffin_2
From the archives.

These golden brown muffins owe their airy crumb and glossy exterior to egg whites used in place of full eggs (it also makes them healthier too, but that's not really the point).  Serve them warm with butter or jam for a delicious breakfast or in addition to a brunch menu.

Banana_muffin_interior_2

Banana Muffins
Makes about 12 muffins

Ingredients

1 C sugar
4 egg whites
1/2 C butter, softened
2 ripe bananas
1/4 C milk
2 C flour
1 tsp baking powder
1/2 tsp baking soda

Method

Preheat oven to 350F and butter a muffin pan.

In a large bowl mix the butter, sugar and egg whites.

In a second bowl mash the bananas and milk together.

In a third bowl mix the flour, baking powder and baking soda.

Add the one third of the banana mixture to the butter mixture - combining gently.  Add one third of the flour mixture to the butter mixture - combining gently.  Repeat until all ingredients have been incorporated.  Do not over-mix.

Pour batter into the prepared muffin tin and bake about 40 minutes. 

Squash Dinner Rolls

Pb220213

During my last year at Reed College in Portland, Oregon, my roommate Tamara and I were invited to have Thanksgiving with our friend Erik, his father and his step-mother.  The food was incredible and a welcome change for the three of us students.  Michael and Lorie were wonderful hosts and it was an evening full of excellent conversation and warmth.  It was always sad to be unable to fly home for Thanksgiving, but the hospitality that I found in other homes and with new friends on those occasions is something that I will never forget.

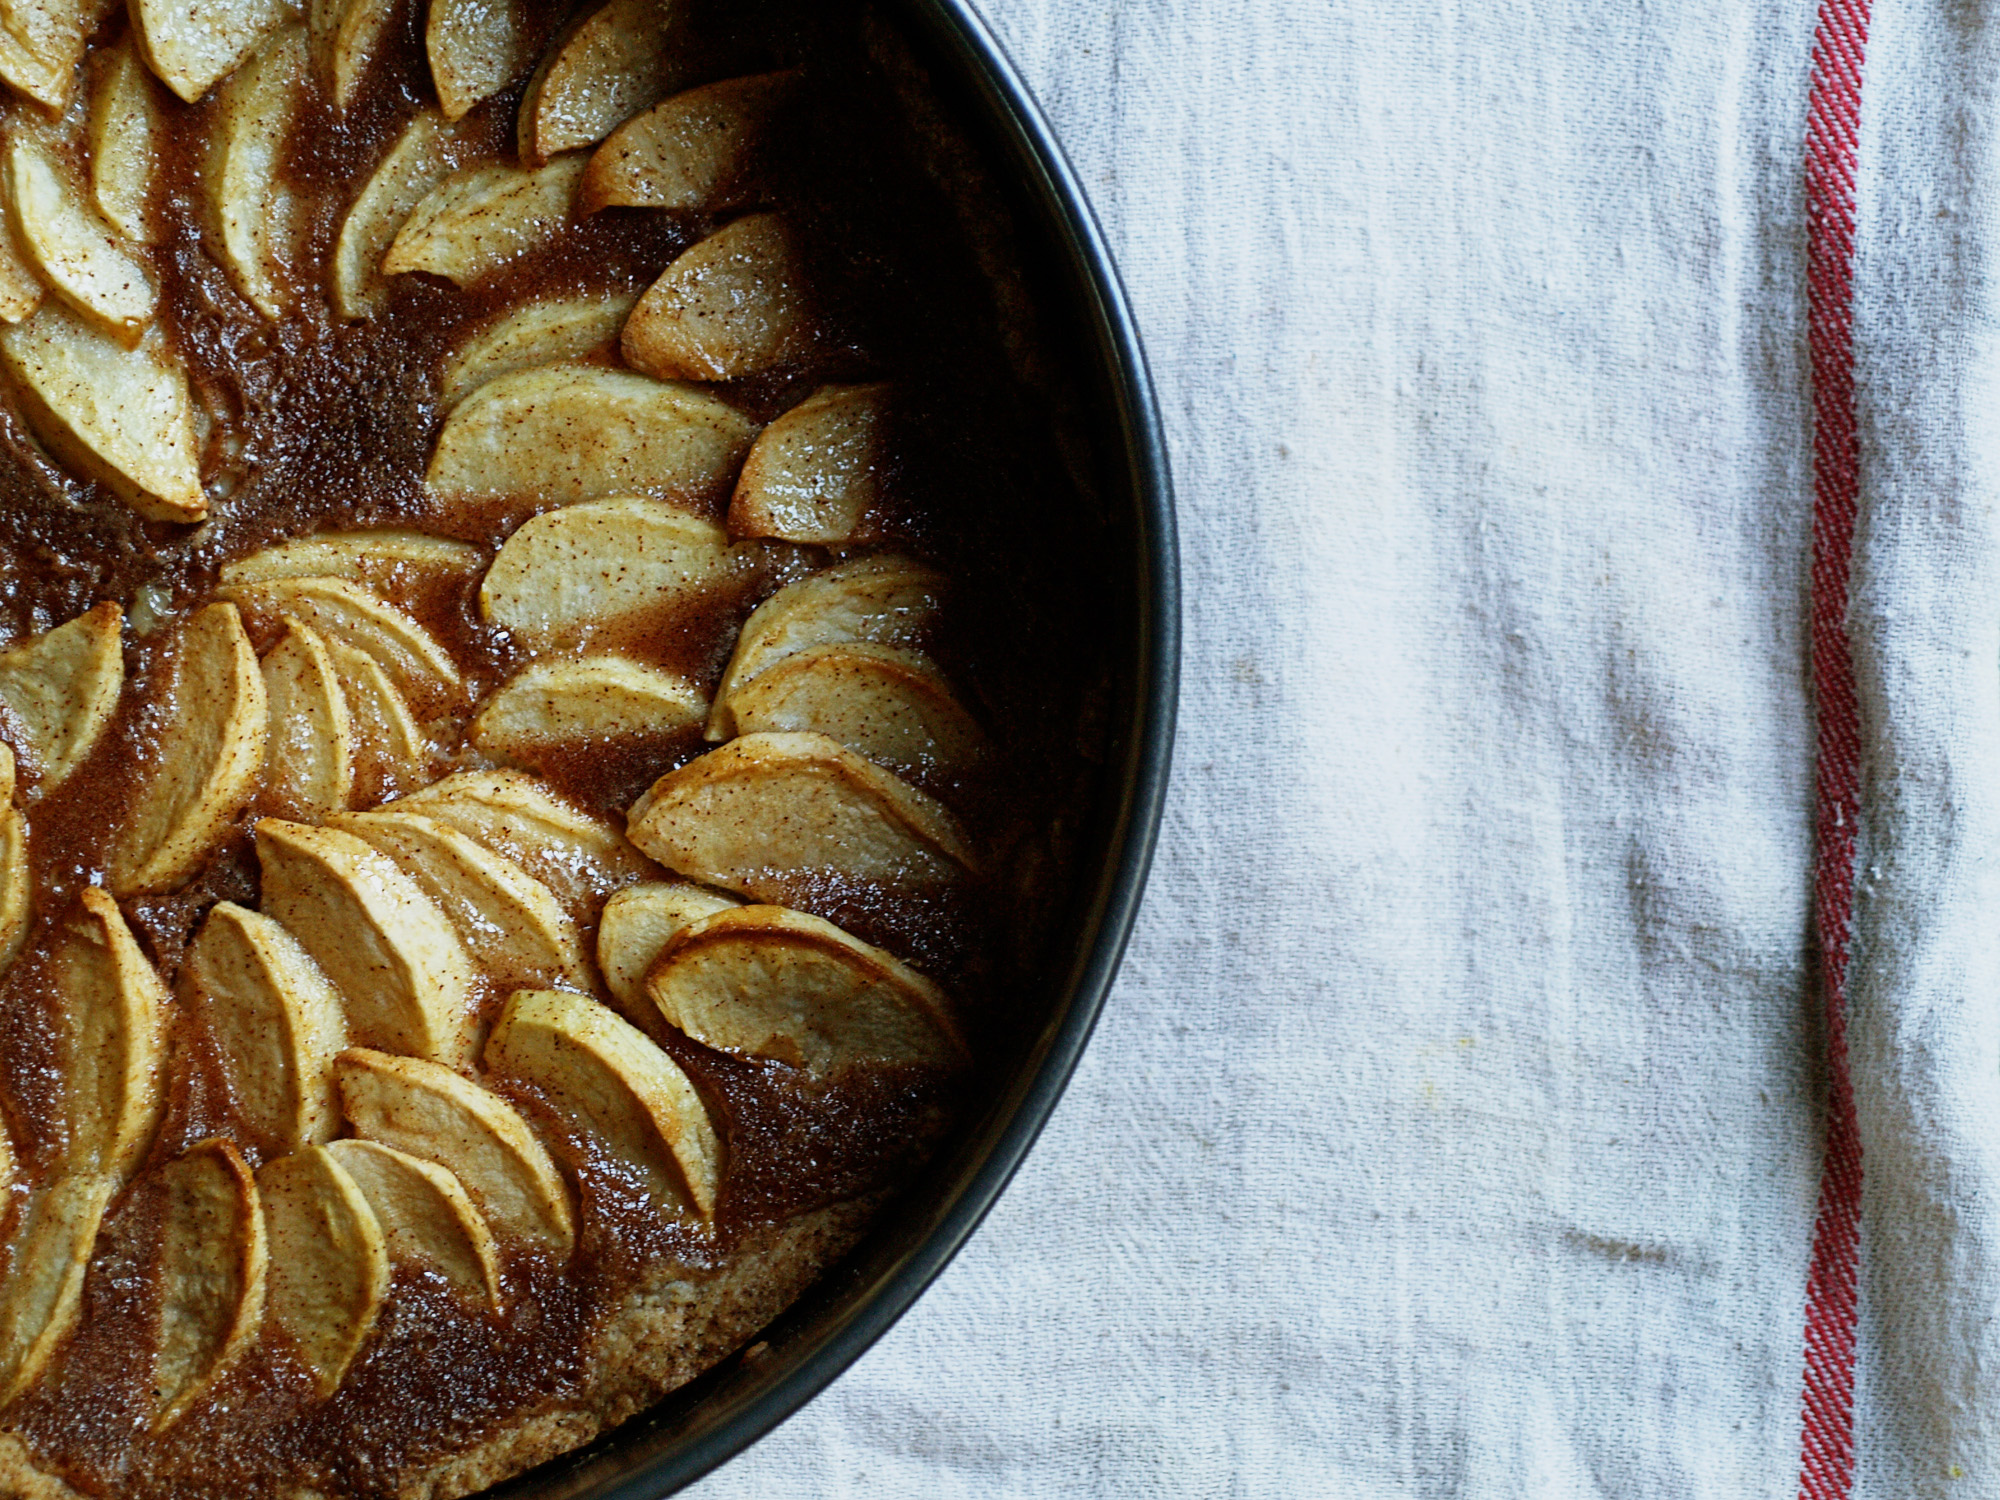
Another thing that I will never forget are Lorie's incredible squash rolls.  I had always regretted leaving that day without requesting the recipe, so this year I asked Erik to put me in touch with her.  Not only did I receive the recipe, I was also treated to a lovely story:

"When I was first making this recipe, I was ... doing subsistence farming in northern British Columbia. So they were made with Hubbard squash that we grew in our garden and with flour that we ground each morning as we waited for the cabin to heat up, and of course they were baked in a wood-burning stove."

That sounds like such an inviting environment, especially as I am bracing myself for another dark, city winter.  These rolls are delicious anywhere, but I bet they were particularly comforting when baked in a wood-burning oven.  Thank you very much to Lorie for introducing me to these rolls and for providing me with the following recipe.

Pb220172

Squash Rolls
from The Garden Way Bread Book, A Baker’s Almanac by Ellen Foscue Johnson

Makes about 2 dozen rolls

Ingredients

1 C milk
¼ C maple syrup or honey
4 Tbl sweet butter or light oil
2 tsp salt
1 C cooked winter squash (fresh or frozen)
(You may also use pumpkin, fresh or canned.)
1½ Tbl dry yeast
(or 1 Tbl dry yeast + 1 C sourdough starter)
¼ C warm water
½ tsp sugar or honey
2 eggs
1 tsp grated orange peel or ¼-½ C sautéed onion
6 ½ C unbleached white flour, approximately

Method

In a saucepan scald the milk. Add the maple syrup, butter, salt, and squash, stirring to mix well. Let sit until lukewarm.

In a large bowl dissolve the yeast in the warm water with the ½ teaspoon sugar or honey. When it is bubbly, add the cooled milk-squash mixture, eggs, orange peel and 2 2/2 cups of the flour. Beat with an electric mixer 2 minutes or at least 200 strokes by hand. Gradually add enough more flour to make a dough that pulls away from the sides of the bowl and is stiff enough to knead.

Turn the dough out onto a floured board and knead until smooth and elastic, sprinkling with a little more flour if it remains sticky.

Put the dough into a buttered bowl, turn to coat all sides or brush the top with melted butter. Cover and let rise until doubled in bulk.

Punch the dough down, turn out onto a floured board and knead a few times to press out air bubbles. Cut into pieces about the size of eggs, cover and let rest for 10 to 15 minutes. Form into rolls of whatever shape you wish (the easiest is to make balls and put in buttered muffin tins). Brush the tops with melted butter and let rise, lightly covered, until not quite double in size.

Preheat the oven to 375 degrees F. Bake 15 minutes, or until done. Break one open to test. Do not over-bake. Serve hot, or, if you plan to save then until the next meal or freeze, bake for a slightly shorter time, cool on a rack and re-heat.

Thank you Lorie!

Kuma's Corner

Img_1857

Last night Eileen, Nick and I went to Kuma's Corner for dinner.  I just returned from a business trip to Baltimore (more on that in a future post) and Eileen is departing for a 20 day trip to Ireland, Spain and Morocco this evening.  After the insane storms in the afternoon that left many of the streets flooded, knocked trees onto unsuspecting parked cars near my house and flooded and closed Eileen's school, the subsequent calm and balmy evening provided perfect weather for Kuma's patio.  They gave us a lot of "if you sit out there, it is at your own risk" talk when we sat down, but by the time we left the patio was completely full.

The server informed us that the taps were super warm and not recommended that evening.  Turning instead to the bottle menu, we attempted to order about six beers that they were out of.  Fairly annoyed, Nick ordered a Coke and I wound up with a decent, but certainly not new or exciting Great Lakes Elliot Ness amber lager.  It seems like bars and liquor stores are consistently out of what we want lately.  But the real reason for this trip was the incredible food at Kuma's Corner.  Famished, we got to ordering.  Eileen ordered the "Iron Maiden" with chicken breast, avocado, cherry peppers, pepper jack, and chipotle mayo (I forgot to photograph hers). I ordered the "Neurosis" with a veggie burger, cheddar, swiss, sauteed mushrooms, caramelized onions and horseradish mayo. 

Img_1858

Nick ordered their stunning flagship burger, the "Kuma Burger."  A half pound black angus burger with bacon, cheddar and a fried egg on top.  A truly beautiful and impressive item.  As Nick pointed out, it's like putting the "whole barnyard" in your stomach. All of their burgers are served on delicious pretzel buns that are made by Labriola Baking Company in Chicago.  Sadly, Labriola only provides their artisan breads to restaurants and hotels at the moment.  Though, there seems to be talk of an eventual retail space.

Img_1850

As you can most likely gather from the assortment we ordered, the burgers can be made with traditional beef, chicken breast, chicken fingers or a veggie burger.  They run between $10 - $12 and come with homemade chips or fries.  Their ketchup is noteworthy as they add some subtle spiciness to it.  Aside from the lack of a beer selection on this visit, Kuma's has consistently impressed me with their food and beers.  I keep meaning to order their "Make your own mac and cheese," but with 16 different burgers to choose from I always seem to end up on that side of the menu.

Avocado and Black Bean Tacos with Homemade Tortillas

Img_1020

Saturday afternoon Nick and I met some friends to map out the 2007 CUDGEL urban golf route.  We are holding the event Sunday, May 27th (the day before Memorial Day).  Check out our soon to be updated CUDGEL webpage and Myspace page for more details and to sign up. 

The weather was absolutely gorgeous, so upon returning to Logan Square we wondered what we would do with the rest of the day.  We had two perfectly ripe avocados that needed to be used in our dinner, but past that we didn't have many ingredients.  Thanks to my new tortilla press, all we needed was a cup of masa harina, a can of black beans, and some rice to make a fabulous meal.

Img_0996

Tortillas
Makes about 8 6-inch tortillas

1 C Masa Harina
1 C warm water
2 tsp salt

In a medium sized bowl combine all of the ingredients.  Work together with a wooden spoon or with your hands (easier).  Don't worry about over-mixing, but the dough should come together easily.  Cover the bowl with a kitchen towel and let sit for about 10 minutes. 

Meanwhile heat your cast-iron skillet or heat your frying oil.  Divide the dough into 8 round pieces.  As you work with each ball of dough, add a few more teaspoons of warm water with your fingers and work through the dough. I have found that adding a bit more water than called for makes the dough much more manageable and reduces the dry, split edges that sometimes show up after pressing. 

Place a ball of dough on a plastic lined tortilla press (recycled plastic bags work fine).  Hold the dough away from the handle and then slowly press the dough between the metal pieces.  Peel back the top piece of plastic and remove from the second piece just before you add the tortilla to the hot pan or oil.  Keep the other dough covered while you make each tortilla. If cooking in a pan, give each side 1 and a half to 2 minutes.

Img_1005_2

A tortilla press is certainly not necessary to make homemade tortillas, however it does make the process quite a bit easier. In the past I have always cooked my tortillas on a hot cast iron skillet, but this time Nick fried them and folded them into shells.  They were very tasty.  They turned out to be a surprisingly bright yellow.  We decided that next time we might cook them briefly before frying, though this isn't necessary.

We sat outside on my porch while we ate and enjoyed some Pabst.  This was a very simple and satisfying meal or a lazy weekend day.

Dinner with a Food Blogger and Mark Bittman's No Knead Bread

I recently had the opportunity to dine with a lovely fellow food blogger, Alanna from A Veggie Venture.   Alanna was in Chicago on business and we decided to meet at a restaurant near her hotel, the Basil Leaf Café.  The restaurant was quiet and the food was quite good.  I ordered the Butternut Squash Ravioli with Fresh Spinach & Roasted Garlic in Basil Oil and would recommend it.  We sat and talked for nearly three hours.  It was a very enjoyable evening. 

Img_0923_2

During our conversation Mark Bittman's No Knead Bread came up.  I haven't been baking bread very often lately, but this reminder encouraged me to throw together this very simple dough on Monday night. 

When I returned home from work on Tuesday I took the bread through the final rise and baked it in my new cloche.  Nick and I made a nice dinner of goat cheese and roasted tomato ravioli with a garlic cream sauce.  The bread turned out wonderfully, with a gorgeous crust and a light sour taste.  We enjoyed it warm with dill havarti cheese while we finished our wine and watched episodes of 30 Rock.

It seems every food blogger has made this bread, so I won't bother reposting the recipe here (you can also find a video).  I would recommend that bakers, both new and seasoned, give this bread a try.  The results are great.  I do find it a bit funny that the absence of kneading should make bread making so much more accessible.  I actually really enjoy kneading bread.  Rather, it is my impatience with letting dough rise for hours (or days) that is the most bothersome.  However, this recipe provides some great instruction for the home baker, particularly when it comes to creating a good oven environment.  Putting the dough inside of a well preheated container, be it a cloche or heavy pot, will offer dramatically different results than simply placing the dough on a sheet pan.

Thanks for looking me up Alanna, and for reminding me of this great recipe!

Black Bean Soup and Cornbread

Img_0478_1

Last weekend my brother came into the city to spend the day with me before he returned to Grinnell to finish out his senior year.  We wandered around Logan Square, drank coffee in the cold, took the train down to Chinatown to eat a delicious lunch and buy tea, and stopped at the grocery store on the way home.  Nick came over and the three of us made a truly satisfying black bean soup and some cornbread with my new cast-iron skillet.

The soup was so delicious that Nick and I made a second pass at it Sunday evening, with a few modifications.

Hearty Black Bean Soup

Generously serves four or five.

Ingredients:

2 Tbl butter
1 onion, finely chopped
2 celery stalks, finely chopped
1 red bell pepper, finely chopped
1 habanero pepper, finely chopped (remove the seeds, if you please)
3 cloves garlic, minced
2 cubes vegetable bouillon
1 and 1/2 C boiling water
2 15 oz cans black beans, undrained
1 15 oz can pinto beans, undrained
1/4 tsp salt
1/2 tsp cumin
1/2 Tbl brown sugar
1/2 tsp black pepper
the juice of one lime
1 and 1/2 Tbl cornstarch

Img_0452

In a large stock-pot melt the butter over medium-low heat and add the onion, celery, peppers, and garlic.  Cook until the onion begins to turn translucent. Mix the boullion and boiling water and add to the pot, simmer for about 10 minutes.

Img_0473

Add the beans, salt, cumin, brown sugar, and black pepper.   Stir well and allow to simmer for about 5 minutes.  In a small glass combine the cornstarch and 1 and 1/2 Tbl of water, stir well.  Add this mixture and the lime juice to the soup, stir well.  Allow to simmer and thicken for about 10 more minutes.  You may now serve the soup or turn the heat to low and allow the flavors to muddle until you are ready to eat.  This soup keeps well for a few days in the refridgerator.  The flavors will become deeper overnight.

Img_0443

For the skillet cornbread I used the recipe from Williams-Sonoma Essentials of Baking, a book I have been quite pleased with.  The cornbread is delightful dipped in the soup or served warm with butter and honey.

Baked and Fried Stale Breads (IMBB #25)

IMBB#25 is hosted this month by An Obsession With Food.  Head over to the Is My Blog Burning? website to learn more about this and other food events.  Derrick chose the excellent theme of stale bread.  As a home bread baker and a bread addict, I tend to have a fair amount of the stuff around.  Once in a while a baguette, or more rarely some delectable levain, will end up fairly stale.  Panzanella, pain perdu, croutons, and bread pudding are all excellent and frequent uses, but for this IMBB I chose to mimic a cooking technique that I recently saw a friend in Moscow use. 

I tried both a fried and baked version.

Img_8077

Fried Stale Bread with Pseudo-Coddled Eggs

The moistened bread, coddled eggs, and butter created a lovely creamy texture and taste.

Serves 2

Ingredients

4 slices of stale French or Italian style bread (I used D'Amato's Home Style Filone)
1 C hot water
1 tsp salt
4 Tbl butter
4 eggs
1 Tbl shredded cheese (I used mozzarella)
1 Tbl grated Parmesan
1 tsp dried rosemary
2 Tbl greens or julienned vegetables
salt and pepper to taste.

Cut the bread into 1 inch slices.  Make a small depression in the center of each with your thumb.  Mix the hot water and salt in a bowl and dip each side of the bread slices into the water -- do not soak.  Place on a paper towel to get rid of the excess moisture.

Butter the sides without the depressions liberally and place into a frying pan over medium heat.  Break an egg into the depression of each slice.  The egg will spill over the sides.  Sprinkle on the rosemary. Cover and let cook for about 5 minutes.  In the last minute add a bit of each type of cheese to the tops.  The eggs are ready when the whites are opaque.  (You may cook them longer if you prefer more solid whites, though it is best to leave the yolks runny.)  Season to taste, top with greens or vegetables and serve warm.

Img_7573
Stale Bread Baked with Eggs and Tomato Chutney

Serves 2

Ingredients

4 slices of stale French or Italian style bread (I used D'Amato's Home Style Filone)
2 eggs
4 Tbl butter
2 Tbl shredded Cheddar
4 Tbl homemade tomato sauce or tomato chutney.
Salt and pepper to taste

Preheat over to 350F

Slice the bread into 1 inch sections.  Remove the very center from two of the slices.  Liberally butter one side of the intact slices.  Place buttered side down on a baking sheet, top each with one of the remaining slices, and break an egg into the holes in the top slices.

Bake for about 10 minutes, watching carefully.  When the whites are just set add the cheese and chutney to the tops of each.  Bake a further 3 or 4 minutes until toppings are warmed.  Season to taste.

Potato and Cheddar Biscuits

Img_7669

Yesterday I woke up early and walked to the bakery where I was trained these last few weeks.  It appears that I will be starting to work on the sales side of the operation tomorrow, with the likely possibility of being able to fill in for people in the bakery proper when need be.  I suppose that is better than nothing and at least I will be able to somewhat replenish my quickly dwindling financial funds.

I returned home and decided to bask in the buttery sunlight of the kitchen while making potato and cheddar biscuits.

Img_7674

Potato and Cheddar Biscuits

1 1/4 C baking potato
2 C unbleached flour
1 tsp salt
1 Tbl baking powder
5 Tbl butter
1/4 C milk
1 Tbl poppy seeds (or other seeds such as caraway or fennel)
3 Tbl cheddar cheese (shredded)
1 egg
2 Tbl water

Preheat oven to 450F

Chop the potatoes into cubes and add to salted boiling water (you can peel the potatoes if you so desire).  Boil for about 10 minutes or until they are tender when pierced with a fork.

Drain and transfer to a small bowl.  Mash the potatoes and allow to cool.

In a separate and larger bowl combine the flour, salt, and baking powder.  Cut the butter into small pieces and rub into the flour mixture until it resembles a coarse meal.  Add the potatoes and the milk.  Combine until a sticky dough is formed.

Grease or line a baking sheet.

Using your hands form the dough into 10 rounds about 1/2 an inch in thickness and place on the baking sheet.

Whisk the egg with the water in a small bowl.  Brush the biscuits with the egg wash.  Add the poppy seeds to the tops of each.

Bake for about 10 minutes and then add the cheddar cheese to the tops of each.

Bake for another 10 minutes or until risen and golden brown.  Serve warm.

Img_7685

These biscuits are moist and filling.  They have a silky texture and the cheddar cheese brightens the mellow flavor.  Wrapped in foil they will keep for a day or two, though they won't look as pretty.